Andriod EN
From CMU ITSC Network
Revision as of 08:55, 10 August 2023 by Thomhathai (talk | contribs) (Created page with "<h2><b> How to connect @JumboPlus or @JumboPlus 5 GHz for Andriod </b></h2> <br/><br/> # Go to Settings >> Wi-Fi >> Turn on Wi-Fi and then select @JumboPlus or @JumboPlus5GHz...")
How to connect @JumboPlus or @JumboPlus 5 GHz for Andriod
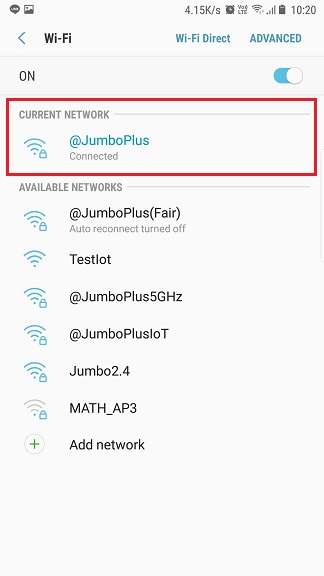
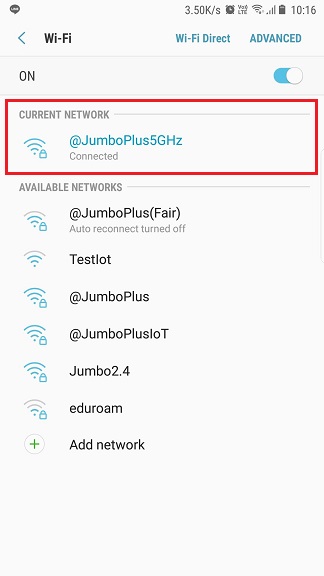
- Go to Settings >> Wi-Fi >> Turn on Wi-Fi and then select @JumboPlus or @JumboPlus5GHz
- If you only see the name @JumboPlus, it means your device supports the 2.4 GHz frequency only.**
- If you see both names, it means your device supports the 5GHz frequency. It is recommended to connect to @JumboPlus5GHz. ***
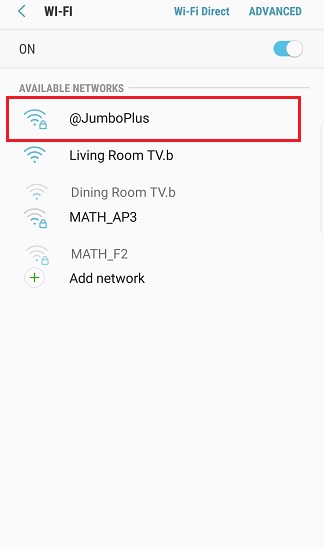
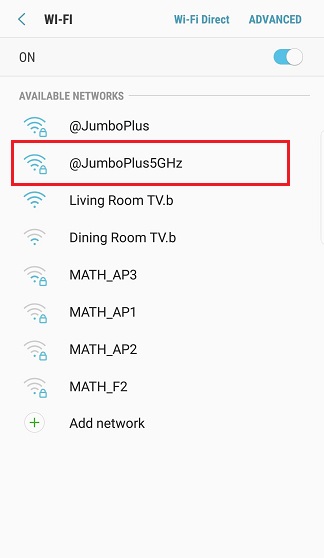
- If you only see the name @JumboPlus, it means your device supports the 2.4 GHz frequency only.**
- เลือกค่าโปรไฟล์ดังนี้
- EAP method (วิธีการ EAP) : PEAP
- Phase 2 authentication (การตรวจสอบสิทธิ์เฟส 2) : MSCHAPV2
- CA certificate (ใบรับรอง CA) : Do not validate / unspecified***
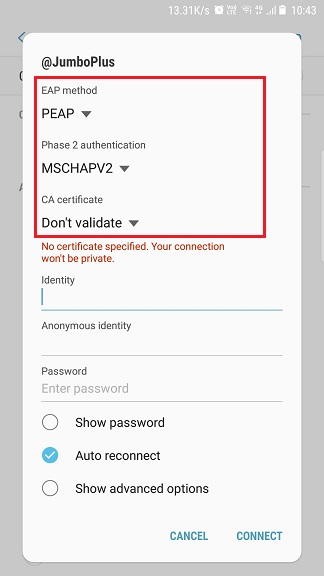
อุปกรณ์บางรุ่นมี Firmware ที่ไม่รองรับมาตรฐาน WPA2 Enterprise ในหัวข้อ CA certificate จะไม่พบตัวเลือก Do not validate / unspecified หรือมีหัวข้อให้ใส่ Domain Name แนะนำให้เชื่อมต่อ @JumboPlusIoT ชั่วคราว จนกว่าอุปกรณ์จะมีการ update Firmware ใหม่
- >>>> วิธีใช้งาน @JumboPlusIoT <<<<
- กรอก CMU Account ที่ช่อง Identity (เอกลักษณ์) และ Password (รหัสผ่าน) จากนั้นกด "Connect"
- นักศึกษา Username : Firstname_Surname@cmu.ac.th
- บุคลากร Username :Firstname.Surname@cmu.ac.th
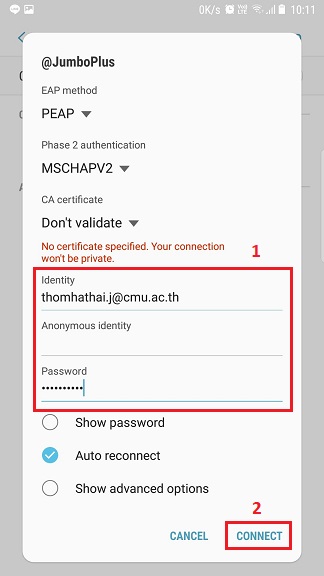
- หลังจากเชื่อมต่อ @JumboPlus หรือ @JumboPlus5GHz สำเร็จแล้ว อุปกรณ์จะจำการเชื่อมต่อไว้ ครั้งต่อไปเมื่ออยู่ในบริเวณที่มีสัญญาณ อุปกรณ์จะทำการเชื่อมต่อโดยอัตโนมัติ
