Difference between revisions of "MacOS EN"
From CMU ITSC Network
Thomhathai (talk | contribs) |
Thomhathai (talk | contribs) |
||
| (20 intermediate revisions by the same user not shown) | |||
| Line 1: | Line 1: | ||
| − | <h2><b> How to connect @JumboPlus or @ | + | <h2><b> How to connect @JumboPlus or @JumboPlus 5 GHz for macOS </b></h2> <br/><br/> |
| − | + | 1. Press the Wi-Fi icon and then select @JumboPlus or @JumboPlus5GHz <br/> | |
| − | #* If you only see the name @JumboPlus, it means your device supports the 2. | + | #* If you only see the name @JumboPlus, it means your device supports the 2.4 GHz frequency only.** <br/> |
| − | #* If you see both names, it means your device supports the 5GHz frequency. It is recommended to connect to @JumboPlus5GHz. | + | #* '''If you see both names, it means your device supports the 5GHz frequency. It is recommended to connect to @JumboPlus5GHz.''' ***<br/><pre style="color: red"> Please select only one name. If you choose both names on the same device, it may result in intermittent connectivity issues. </pre> |
| − | <br/><br/> [[File: | + | <br/> [[File:JumbomacOS1.png | link=]] [[File:JumbomacOS2.jpg | link=]] <br/> |
| − | + | 2. Enter your CMU Account, which you received from the university, and then click '''Join''' <br/> | |
| − | #* | + | #* Student : Firstname_Surname@cmu.ac.th <br/> |
| − | #* | + | #* Staff : Firstname.Surname@cmu.ac.th <br/><br/>[[File:JumbomacOS3.jpg |link=]] <br/><br/> |
| − | + | 3. At Verify Certificate click "Continue" <br/><br/> [[File:JumbomacOS4.png |link=]] <br/><br/> | |
| − | + | 4. Enter your computer's password if there have been any changes '''Certificate Trust Settings''' After that Click '''Update Settin''' <br/><br/> [[File:JumbomacOS5.jpg |link=]] <br/><br/> | |
| − | <br/><br/> [[File: | + | 5. After successfully connecting to @JumboPlus or @JumboPlus5GHz, the device will remember the connection for the next time when in a signal area. The device will automatically connect. <br/><br/> [[File:JumbomacOS6.png |link=]] [[File:JumbomacOS7.png |link=]] <br/><br/> |
Latest revision as of 02:40, 12 August 2023
How to connect @JumboPlus or @JumboPlus 5 GHz for macOS
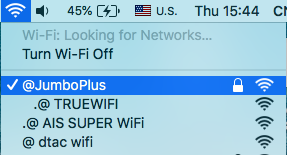
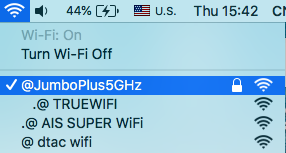
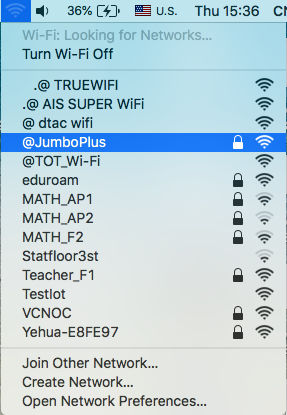
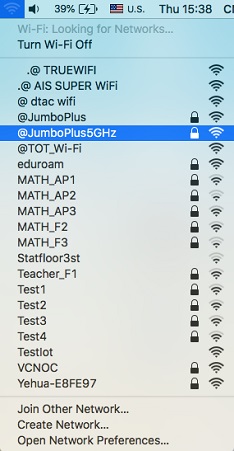
1. Press the Wi-Fi icon and then select @JumboPlus or @JumboPlus5GHz
- If you only see the name @JumboPlus, it means your device supports the 2.4 GHz frequency only.**
- If you see both names, it means your device supports the 5GHz frequency. It is recommended to connect to @JumboPlus5GHz. ***
Please select only one name. If you choose both names on the same device, it may result in intermittent connectivity issues.
- If you only see the name @JumboPlus, it means your device supports the 2.4 GHz frequency only.**
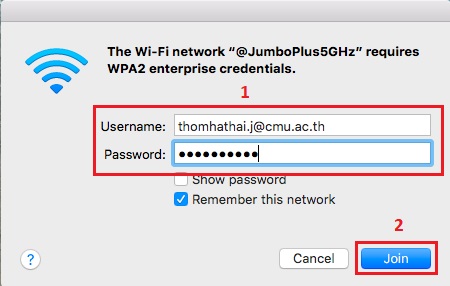
2. Enter your CMU Account, which you received from the university, and then click Join
- Student : Firstname_Surname@cmu.ac.th
- Staff : Firstname.Surname@cmu.ac.th
- Student : Firstname_Surname@cmu.ac.th
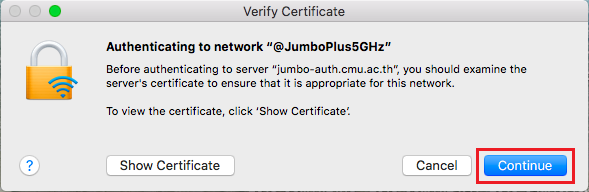
3. At Verify Certificate click "Continue"
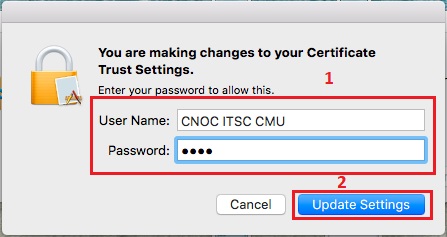
4. Enter your computer's password if there have been any changes Certificate Trust Settings After that Click Update Settin
5. After successfully connecting to @JumboPlus or @JumboPlus5GHz, the device will remember the connection for the next time when in a signal area. The device will automatically connect.