Difference between revisions of "MacOS EN"
From CMU ITSC Network
Thomhathai (talk | contribs) |
Thomhathai (talk | contribs) |
||
| Line 1: | Line 1: | ||
<h2><b> การเชื่อมต่อ @JumboPlus และ @JumboPlus 5 GHz สำหรับ macOS </b></h2> <br/><br/> | <h2><b> การเชื่อมต่อ @JumboPlus และ @JumboPlus 5 GHz สำหรับ macOS </b></h2> <br/><br/> | ||
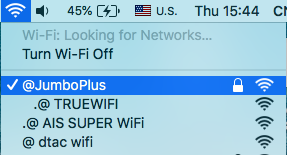
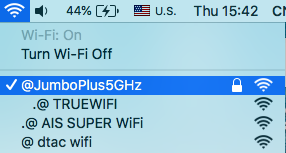
| − | # | + | # Press the Wi-Fi icon and then connect @JumboPlus or @JumboPlus5GHz<br/> |
| − | #* | + | #* If you only see the name @JumboPlus, it means your device supports the 2.4 GHz frequency only.** <br/> |
| − | #* | + | #* If you see both names, it means your device supports the 5GHz frequency. It is recommended to connect to @JumboPlus5GHz. ***<br/><br/> [[File:JumbomacOS1.png | link=]] [[File:JumbomacOS2.jpg | link=]] <br/> |
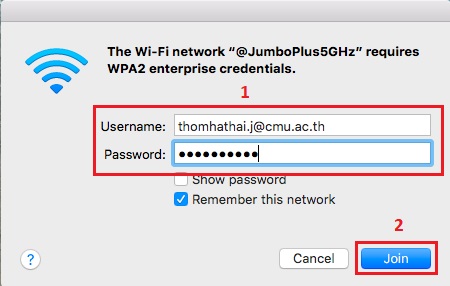
# Enter your CMU Account, which you received from the university, and then click '''Join''' <br/> | # Enter your CMU Account, which you received from the university, and then click '''Join''' <br/> | ||
#* นักศึกษา : Firstname_Surname@cmu.ac.th <br/> | #* นักศึกษา : Firstname_Surname@cmu.ac.th <br/> | ||
Revision as of 08:03, 10 August 2023
การเชื่อมต่อ @JumboPlus และ @JumboPlus 5 GHz สำหรับ macOS
- Press the Wi-Fi icon and then connect @JumboPlus or @JumboPlus5GHz
- If you only see the name @JumboPlus, it means your device supports the 2.4 GHz frequency only.**
- If you see both names, it means your device supports the 5GHz frequency. It is recommended to connect to @JumboPlus5GHz. ***
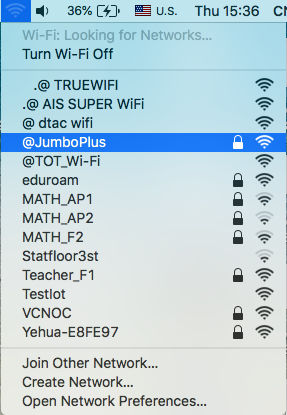
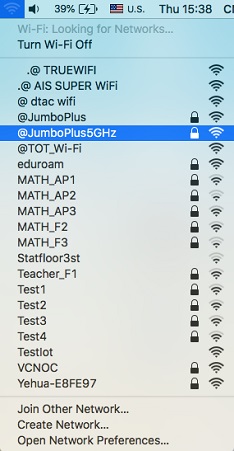
- If you only see the name @JumboPlus, it means your device supports the 2.4 GHz frequency only.**
- Enter your CMU Account, which you received from the university, and then click Join
- นักศึกษา : Firstname_Surname@cmu.ac.th
- บุคลากร : Firstname.Surname@cmu.ac.th
- นักศึกษา : Firstname_Surname@cmu.ac.th
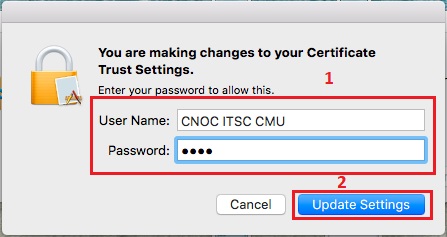
- หากปรากฏหน้าต่าง Verify Certificate ให้กด "Continue"

- กรอกรหัสผ่านเครื่องคอมพิวเตอร์ของท่าน กรณีมีการเปลี่ยนแปลง "Certificate Trust Settings" จากนั้นกด "Update Setting"
- หลังจากเชื่อมต่อ @JumboPlus หรือ @JumboPlus5GHz สำเร็จแล้ว อุปกรณ์จะจำการเชื่อมต่อไว้ ครั้งต่อไปเมื่ออยู่ในบริเวณที่มีสัญญาณ อุปกรณ์จะทำการเชื่อมต่อโดยอัตโนมัติ
