Difference between revisions of "CMU GlobalProtect VPN English"
(Created page with "== Introduction == link=<br> '''VPN (Virtual Private Network)''' uses tunneling techniques over the internet, making it appear as if you're still connected to...") |
|||
| (One intermediate revision by the same user not shown) | |||
| Line 25: | Line 25: | ||
=== Installation === | === Installation === | ||
| − | # Visit https://vpn-gateway.cmu.ac.th, log in with CMU | + | # Visit https://vpn-gateway.cmu.ac.th, log in with CMU Account, and download the installer. Right-click or double-click '''GlobalProtect.msi''' and select '''Install'''. <br/> [[File:Gb win 01.png|link=|alt=|border]] [[File:Gb win 02.png|link=|alt=|border]] <br/><br/> |
# At the '''Welcome to GlobalProtect Setup Wizard''' and '''Select Installation Folder''' windows, click '''Next''' <br/> [[File:Gb win 03.png|link=]] [[File:Gb win 04.png|link=]] <br/><br/> | # At the '''Welcome to GlobalProtect Setup Wizard''' and '''Select Installation Folder''' windows, click '''Next''' <br/> [[File:Gb win 03.png|link=]] [[File:Gb win 04.png|link=]] <br/><br/> | ||
# At the '''Confirm Installation''' window, click '''Next''', wait until '''Installation Complete''' appears, then click '''Close'''<br/> [[File:Gb win 05.png|link=]] [[File:Gb win 06.png|link=]] <br/><br/> | # At the '''Confirm Installation''' window, click '''Next''', wait until '''Installation Complete''' appears, then click '''Close'''<br/> [[File:Gb win 05.png|link=]] [[File:Gb win 06.png|link=]] <br/><br/> | ||
| Line 39: | Line 39: | ||
== Using GlobalProtect on macOS == | == Using GlobalProtect on macOS == | ||
=== Installation === | === Installation === | ||
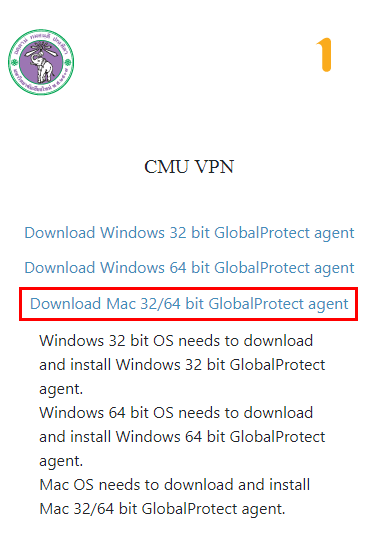
| − | # Visit https://vpn-gateway.cmu.ac.th, log in, and download the installer.<br/> [[File:Gb mac 01.png|link=|alt=|border]] <br/><br/> | + | # Visit https://vpn-gateway.cmu.ac.th, log in with CMU Account, and download the installer.<br/> [[File:Gb mac 01.png|link=|alt=|border]] <br/><br/> |
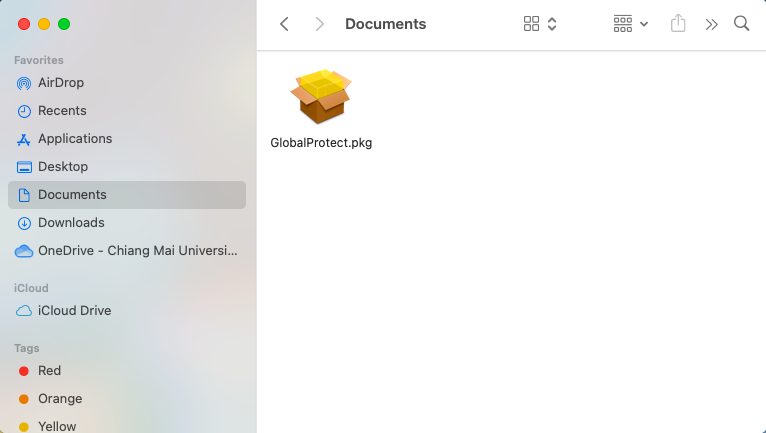
# Double-click '''GlobalProtect.pkg''' to start installation.<br/> [[File:Gb mac 02.png|link=|alt=|border]] <br/><br/> | # Double-click '''GlobalProtect.pkg''' to start installation.<br/> [[File:Gb mac 02.png|link=|alt=|border]] <br/><br/> | ||
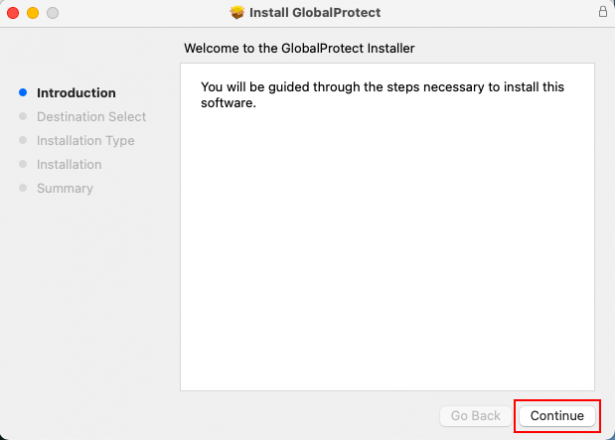
# Click '''Continue''' through Introduction and Destination Select.<br/>[[File:Gb mac 03.png|link=|alt=|615x615px]][[File:Gb mac 04.png|link=|alt=|615x615px]]<br/><br/> | # Click '''Continue''' through Introduction and Destination Select.<br/>[[File:Gb mac 03.png|link=|alt=|615x615px]][[File:Gb mac 04.png|link=|alt=|615x615px]]<br/><br/> | ||
| Line 58: | Line 58: | ||
== Using GlobalProtect on iOS == | == Using GlobalProtect on iOS == | ||
=== Installation === | === Installation === | ||
| − | # Search for '''GlobalProtect''' in the App Store and install it. | + | # Search for '''GlobalProtect''' in the App Store and install it.<br/> [[File:Gpios06.png|541x541px|link=|alt=|border]] <br/><br/> |
=== Connection === | === Connection === | ||
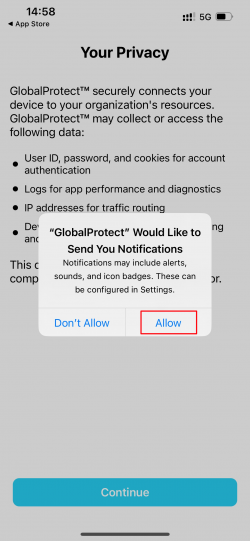
| − | # Open the app, allow notifications, and click '''Continue'''. | + | # Open the app, allow notifications, and click '''Continue'''.<br/>[[File:Gpios01.png|541x541px|link=|alt=|border]] <br/><br/> |
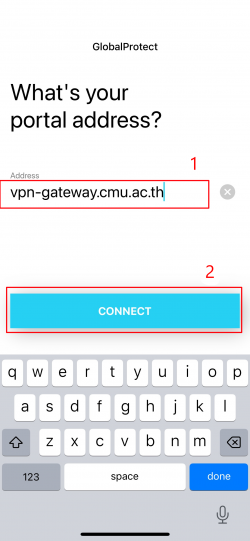
| − | # Enter '''vpn-gateway.cmu.ac.th''' and click '''Connect'''. | + | # Enter '''vpn-gateway.cmu.ac.th''' and click '''Connect'''.<br/>[[File:Gpios02.png|541x541px|link=|alt=|border]]<br/><br/> |
| − | # Log in with your CMU Account. | + | # Log in with your '''CMU Account'''.<br/>[[File:Gpios03.png|541x541px|link=|alt=|border]]<br/><br/> |
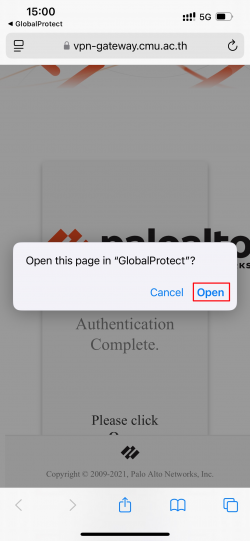
| − | # Click '''Open'''. | + | # Click '''Open'''.<br/>[[File:Gpios04.png|541x541px|link=|alt=|border]]<br/><br/> |
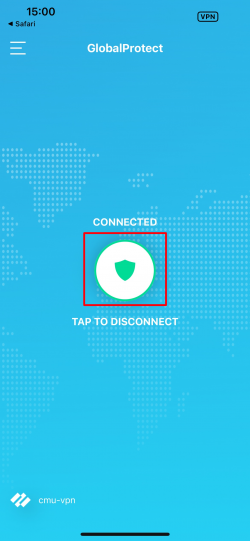
| − | # To disconnect, tap the shield icon in the center. | + | # To disconnect, tap the shield icon in the center.<br/>[[File:Gpios05.png|541x541px|link=|alt=|border]]<br/> |
== Using GlobalProtect on Android == | == Using GlobalProtect on Android == | ||
=== Installation === | === Installation === | ||
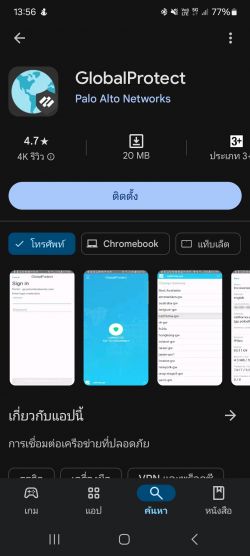
| − | # Search for '''GlobalProtect''' in the Play Store and install it. | + | # Search for '''GlobalProtect''' in the Play Store and install it.<br/> [[File:Gp and 01.jpg|556x556px|link=|alt=]] <br/><br/> |
=== Connection === | === Connection === | ||
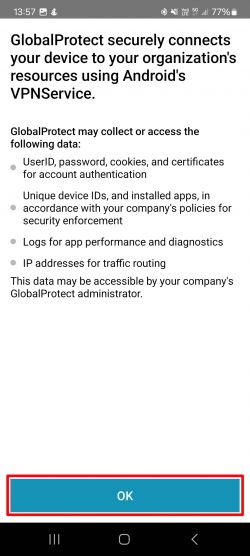
| − | # Open the app and click '''OK'''. | + | # Open the app and click '''OK'''. <br/> [[File:Gp and 02.jpg|556x556px|link=|alt=|border]]<br/><br/> |
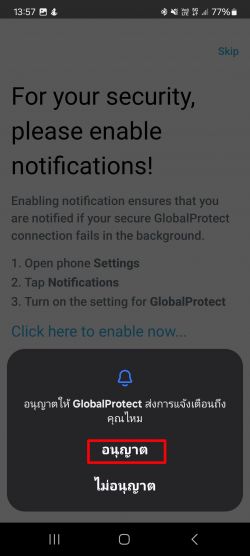
| − | # Allow notifications. | + | # Allow notifications. <br/>[[File:Gp and 03.jpg|556x556px|link=|alt=|border]]<br/><br/> |
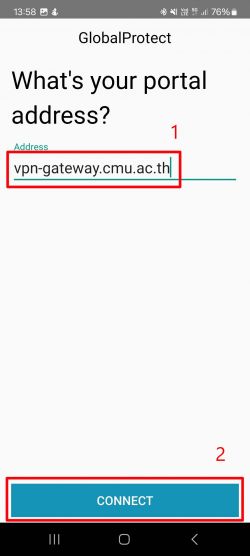
| − | # Enter '''vpn-gateway.cmu.ac.th''' and click '''Connect'''. | + | # Enter '''vpn-gateway.cmu.ac.th''' and click '''Connect'''. <br/>[[File:Gp and 04.jpg|556x556px|link=|alt=|border]]<br/><br/> |
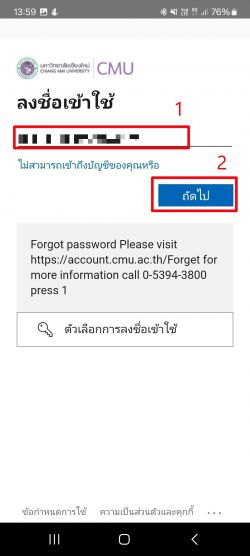
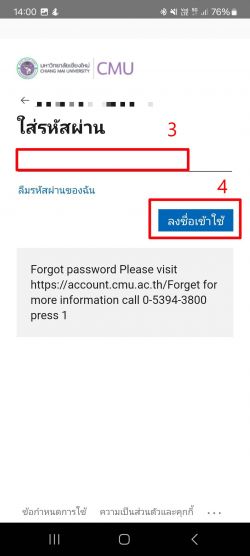
| − | # Log in with your CMU Account. | + | # Log in with your CMU Account. <br/>[[File:Gp and 05.jpg|556x556px|link=|alt=|border]] [[File:Gp and 06.jpg|556x556px|link=|alt=|border]]<br/><br/> |
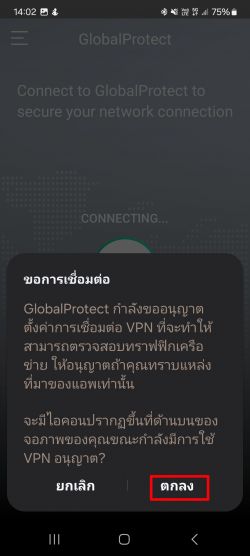
| − | # Click '''OK'''. | + | # Click '''OK'''. <br/>[[File:Gp and 08.jpg|556x556px|link=|alt=]]<br/><br/> |
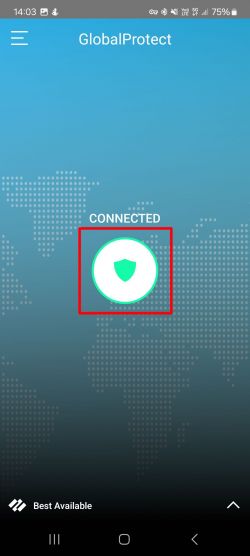
| − | # To disconnect, tap the shield icon in the center. | + | # To disconnect, tap the shield icon in the center. <br/>[[File:Gp and 10.jpg|556x556px|link=|alt=]]<br/><br/> |
== Using GlobalProtect on Linux == | == Using GlobalProtect on Linux == | ||
Latest revision as of 03:42, 21 June 2025
Introduction
VPN (Virtual Private Network) uses tunneling techniques over the internet, making it appear as if you're still connected to the university network regardless of your location. Once connected to the VPN, all traffic is routed through the university's internal network before reaching the internet.
Because VPN makes it seem like you're using the university network, it allows access to resources restricted to internal use only—such as research databases, library articles, and online learning systems—from anywhere. VPN connection requires authentication using a Chiang Mai University IT account before each session.
Important Notes
If you're already using the university's internal network (e.g., faculty network or CMU Jumbo Net Wi-Fi), you do not need to connect to GlobalProtect to access the internet. Doing so unnecessarily burdens the GlobalProtect server. Therefore, GlobalProtect connections from within the university network are blocked.
Terms of Use
- This research network system is for educational and beneficial purposes only.
- Usage is logged according to the Computer Related Crime Act B.E. 2550 (2007).
- If usage negatively affects the system or other users, administrators may terminate access without prior notice.
- Any illegal use under the Computer Related Crime Act B.E. 2550 (2007) will result in legal action against the account holder, regardless of who used the account. Therefore, accounts must be used personally and not shared.
- Access is limited to university-approved websites to prevent misuse of university resources.
- Logging into GlobalProtect VPN with a CMU account implies acceptance of these terms.
Using GlobalProtect on Windows
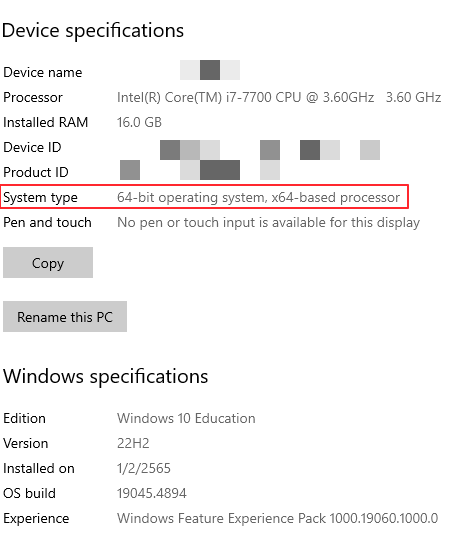
Check System Type
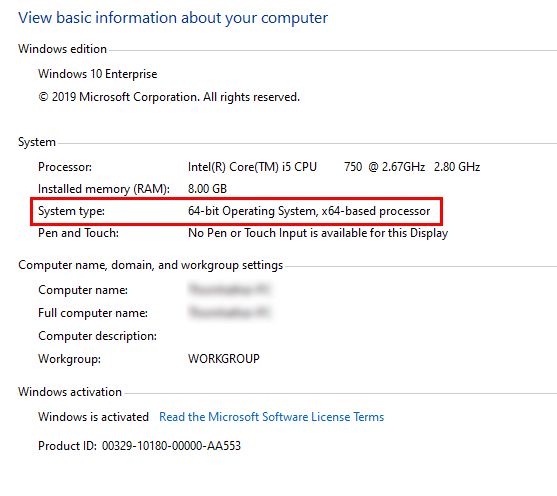
- Right-click on This PC or My Computer, then select Properties
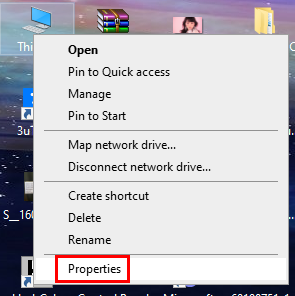
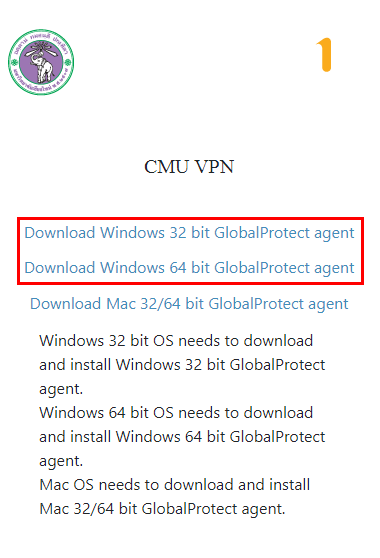
- Check System Type to determine if it's 32-bit or 64-bit for correct file download
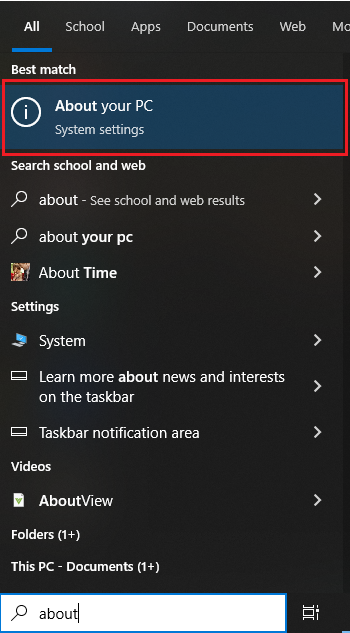
If not visible on Desktop, search for About your PC in the Taskbar.
Installation
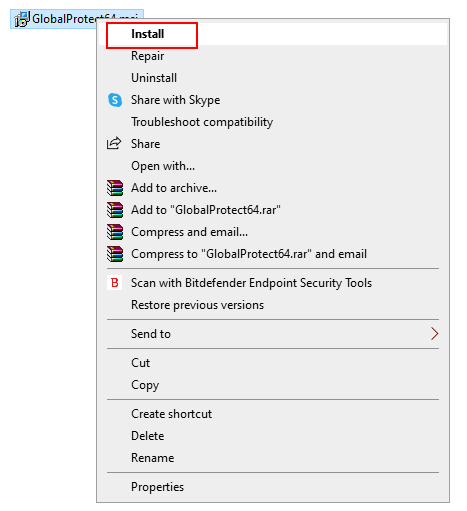
- Visit https://vpn-gateway.cmu.ac.th, log in with CMU Account, and download the installer. Right-click or double-click GlobalProtect.msi and select Install.
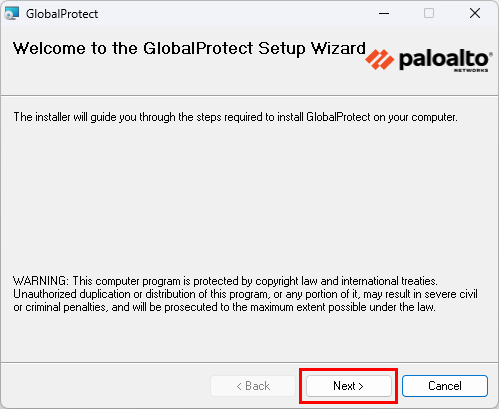
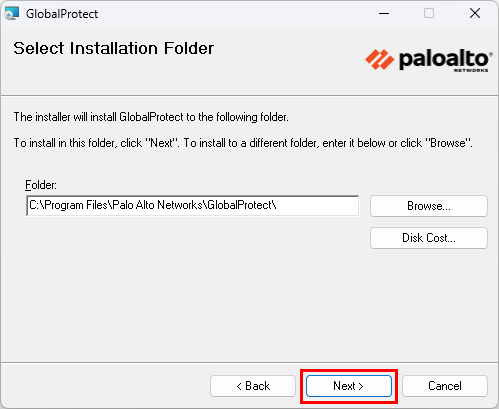
- At the Welcome to GlobalProtect Setup Wizard and Select Installation Folder windows, click Next
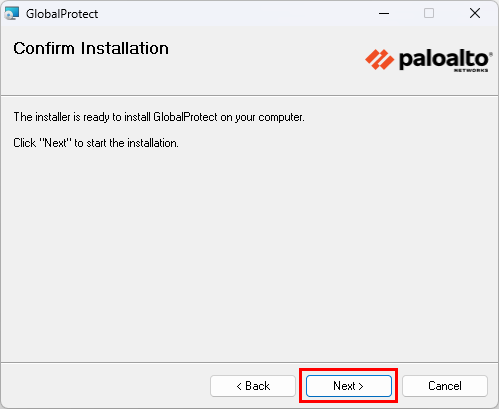
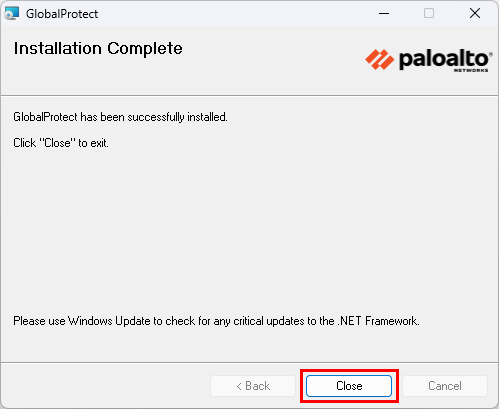
- At the Confirm Installation window, click Next, wait until Installation Complete appears, then click Close
Connection
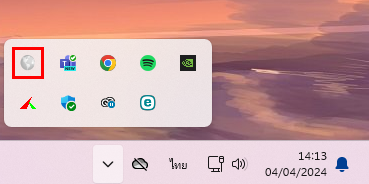
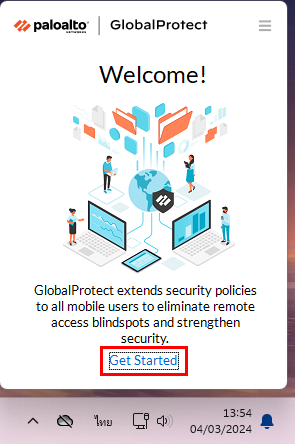
- Click the GlobalProtect icon in the system tray.
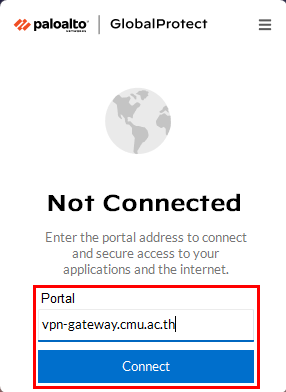
- In the Welcome window, click Get Started, enter vpn-gateway.cmu.ac.th, and click Connect.
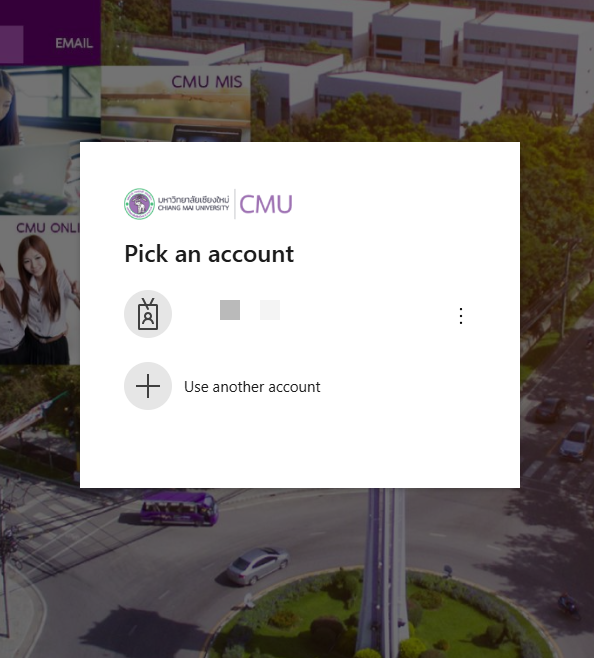
- A browser will open for login with your CMU Account.
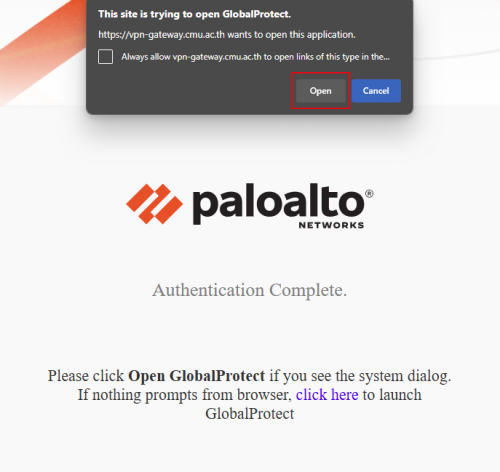
- After successfully logging in, you will be redirected to the Palo Alto web page. Click Open at the top to return to GlobalProtect.
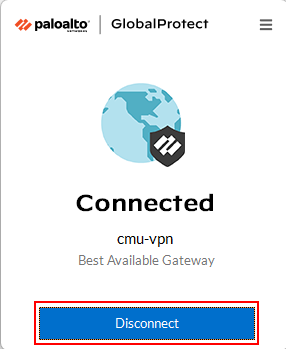
- To disconnect, click the icon in the system tray again and select Disconnect.
- To log out, go to https://mail.cmu.ac.th and perform a Logout
Using GlobalProtect on macOS
Installation
- Visit https://vpn-gateway.cmu.ac.th, log in with CMU Account, and download the installer.
- Double-click GlobalProtect.pkg to start installation.
- Click Continue through Introduction and Destination Select.
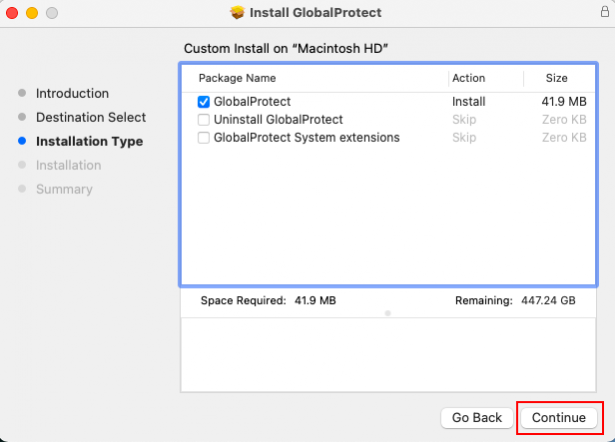
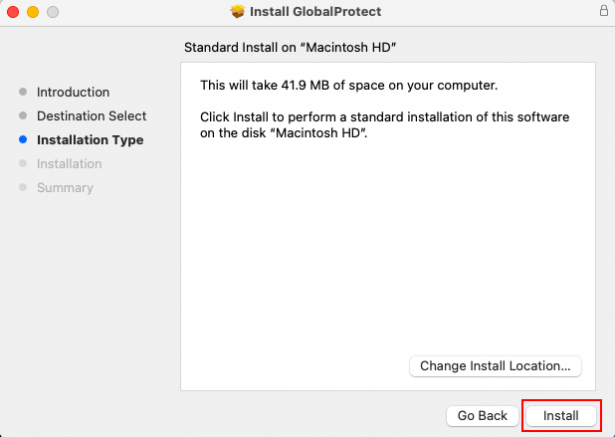
- At the Installation Type screen, click Install.
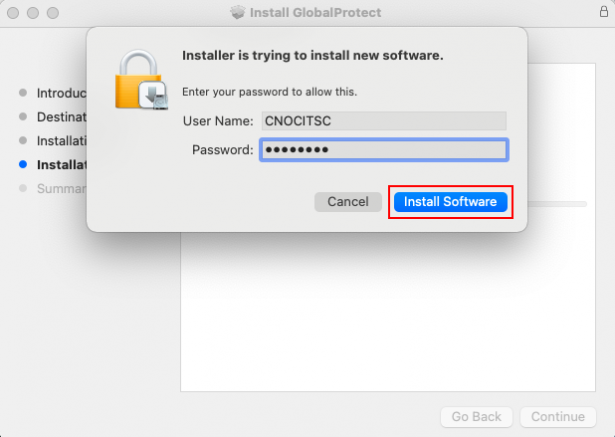
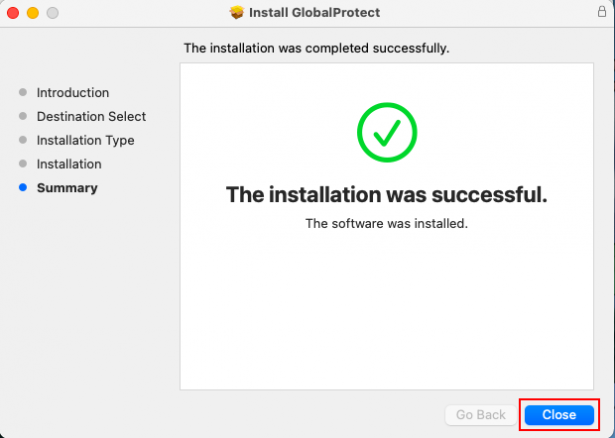
- Enter your device password, click Install Software, wait until the installation is complete, then click Close.
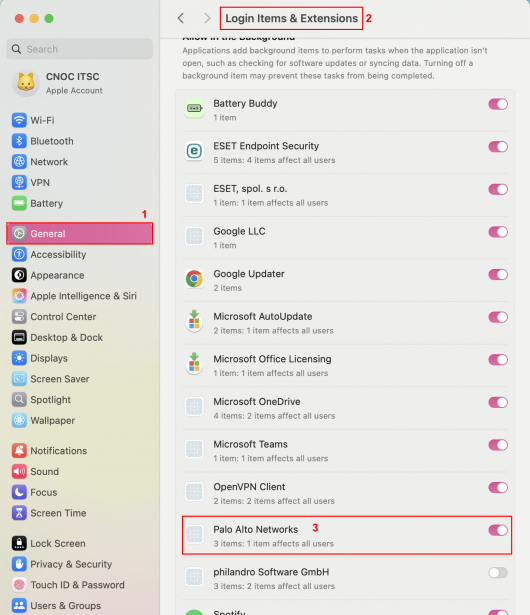
- Go to System Settings > General > Login Items and enable Palo Alto Networks.
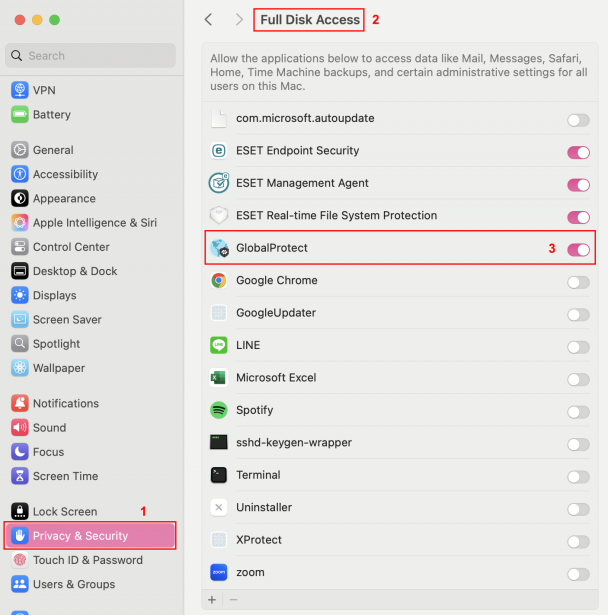
- Go to System Settings > Privacy & Security > Full Disk Access and enable GlobalProtect.
Connection
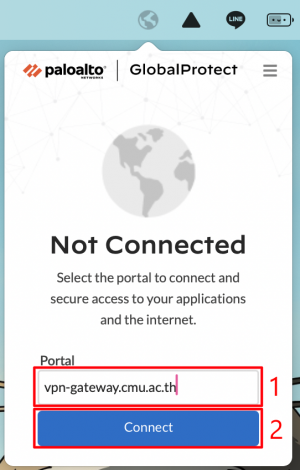
- Open GlobalProtect, click Get Started, enter vpn-gateway.cmu.ac.th, and click Connect.
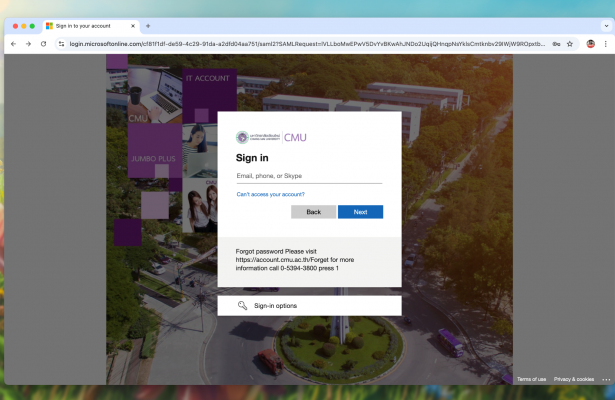
- Log in via browser with your CMU Account.
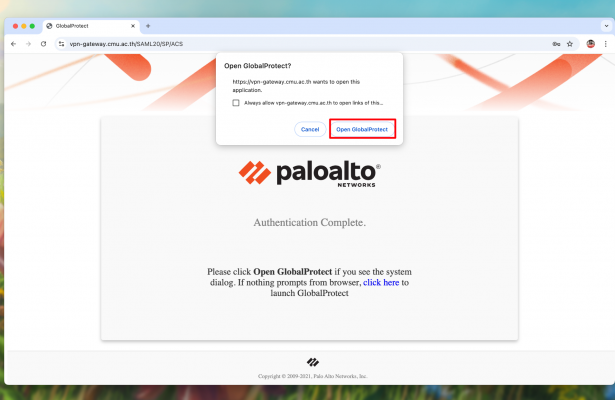
- After successfully logging in, you will be redirected to the Palo Alto web page. Click Open GlobalProtect at the top to return to GlobalProtect.
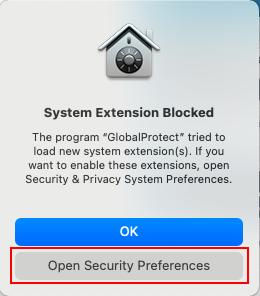
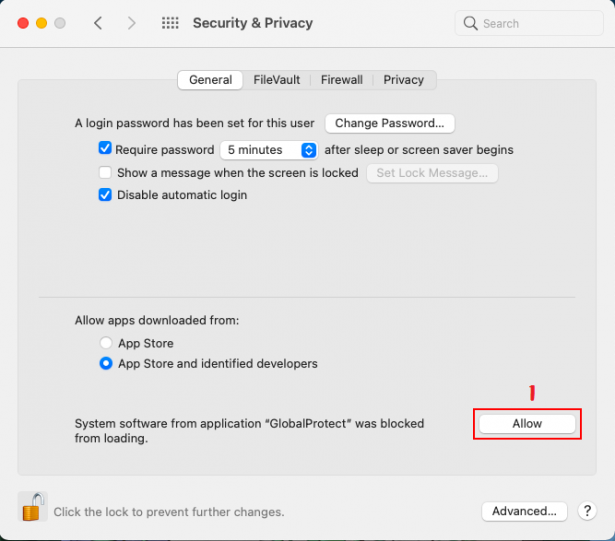
- If prompted with System Extension Blocked, click Open Security Preferences.
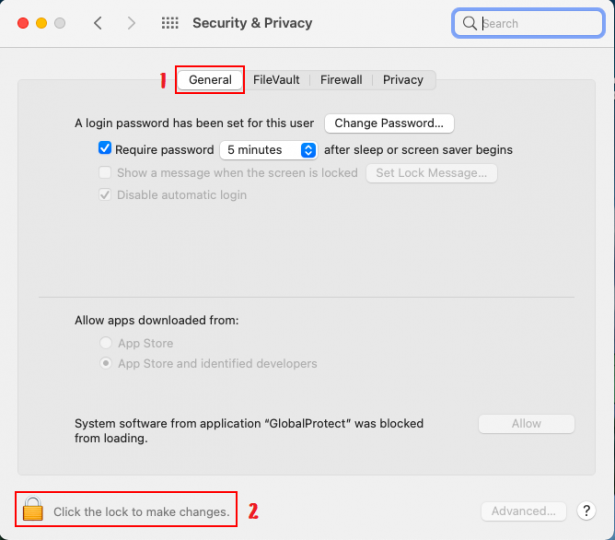
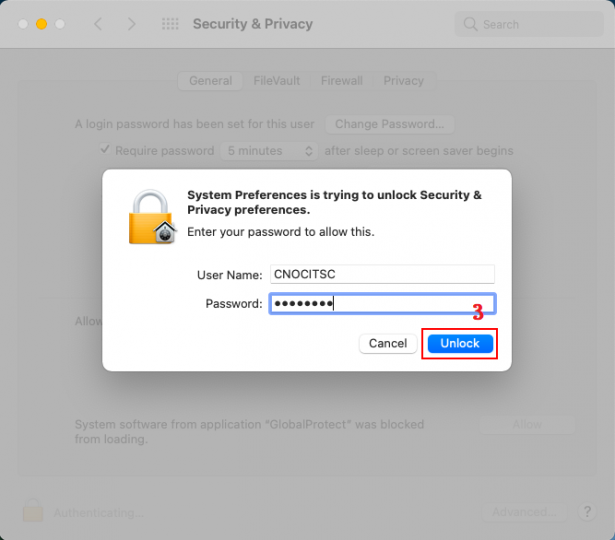
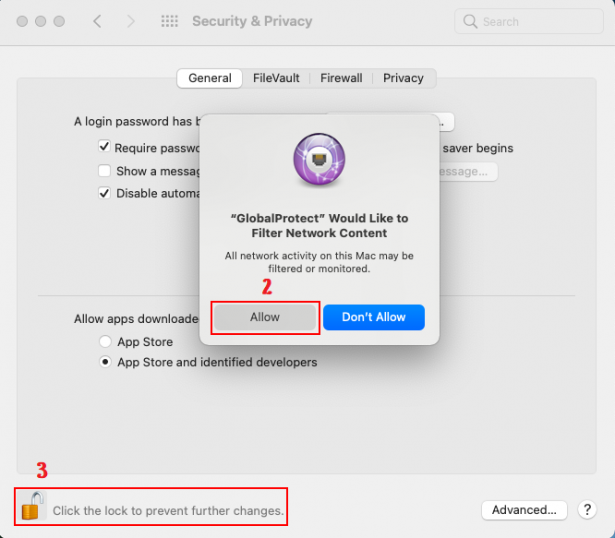
- In the 'General' menu, click the padlock icon at the bottom to unlock. Then enter your device password and click 'Unlock', as shown in the image.
- Click 'Allow' both times as shown in the image. Then click the padlock icon to lock it again.
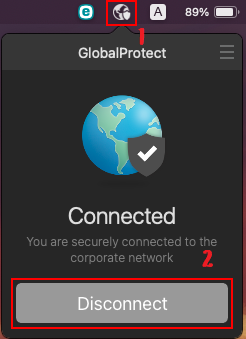
- To disconnect, click the GlobalProtect icon in the menu bar and select Disconnect.
Using GlobalProtect on iOS
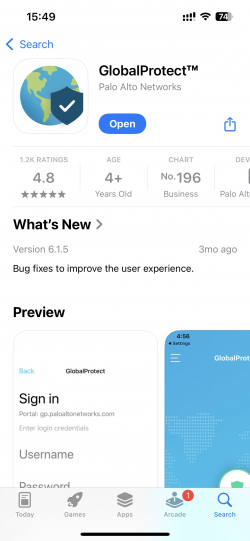
Installation
- Search for GlobalProtect in the App Store and install it.
Connection
- Open the app, allow notifications, and click Continue.
- Enter vpn-gateway.cmu.ac.th and click Connect.
- Log in with your CMU Account.

- Click Open.
- To disconnect, tap the shield icon in the center.
Using GlobalProtect on Android
Installation
- Search for GlobalProtect in the Play Store and install it.
Connection
- Open the app and click OK.
- Allow notifications.
- Enter vpn-gateway.cmu.ac.th and click Connect.
- Log in with your CMU Account.
- Click OK.
- To disconnect, tap the shield icon in the center.
Using GlobalProtect on Linux
You can download the program from this link: [Linux Installer]