Difference between revisions of "Windows 10"
From CMU ITSC Network
Thomhathai (talk | contribs) |
Thomhathai (talk | contribs) |
||
| Line 1: | Line 1: | ||
<h2><b> How to connect @JumboPlus และ @JumboPlus 5 GHz for Windows 10 </b></h2> <br/><br/> | <h2><b> How to connect @JumboPlus และ @JumboPlus 5 GHz for Windows 10 </b></h2> <br/><br/> | ||
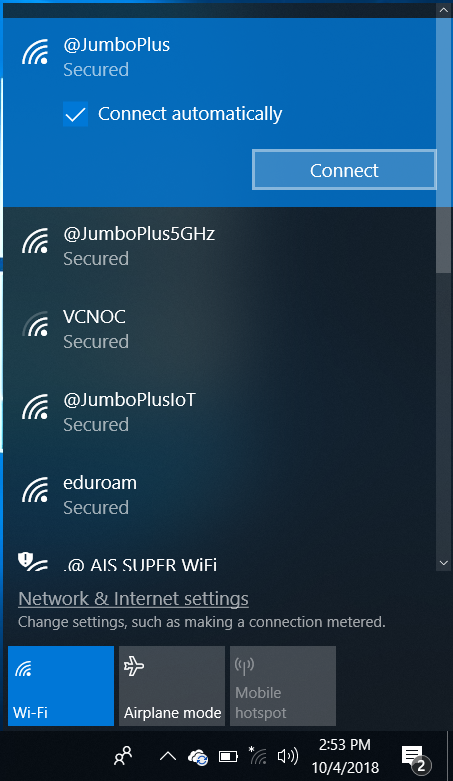
| − | # | + | # กดสัญลักษณ์ Wi-Fi ที่ Taskbar (ด้านล่างขวามือ) [[File:JumboWin10 04.png | link=]] เพื่อเช็คว่าอุปกรณ์เห็นชื่อ Wi-Fi : @JumboPlus หรือ @JumboPlus5GHz <br/><br/> ** กรณีเห็น @JumboPlus ชื่อเดียว แสดงว่าอุปกรณ์ของท่านรองรับคลื่นความถี่ 2.4GHz เท่านั้น ** <br/> *** กรณีเห็นทั้งสองชื่อ แสดงว่าอุปกรณ์ของท่านรองรับคลื่นความถี่ 5GHz แนะนำให้เลือกเชื่อมต่อที่ @JumboPlus5GHz *** <br/> <pre style="color: red"> ให้เลือกสร้างการเชื่อมต่อ Wi-Fi เพียงชื่อเดียวเท่านั้น หากสร้างไว้ทั้งสองชื่อในอุปกรณ์เดียวกัน อาจจะใช้งานแล้วติดๆ หลุดๆ ได้ </pre> |
<br/><br/> [[File:JumboWin10 05.png | link=]] [[File:JumboWin10 06.png | link=]] <br/><br/> | <br/><br/> [[File:JumboWin10 05.png | link=]] [[File:JumboWin10 06.png | link=]] <br/><br/> | ||
# On the Windows Security window, enter your '''CMU Account''', which you received from the university, and then click '''OK''' <br/> CMU Student : Firstname_Surname@cmu.ac.th <br/>CMU Staff : Firstname.Surname@cmu.ac.th <br/><br/>[[File:JumboWin10 02.png|link=]] <br/><br/> | # On the Windows Security window, enter your '''CMU Account''', which you received from the university, and then click '''OK''' <br/> CMU Student : Firstname_Surname@cmu.ac.th <br/>CMU Staff : Firstname.Surname@cmu.ac.th <br/><br/>[[File:JumboWin10 02.png|link=]] <br/><br/> | ||
Revision as of 04:31, 10 August 2023
How to connect @JumboPlus และ @JumboPlus 5 GHz for Windows 10
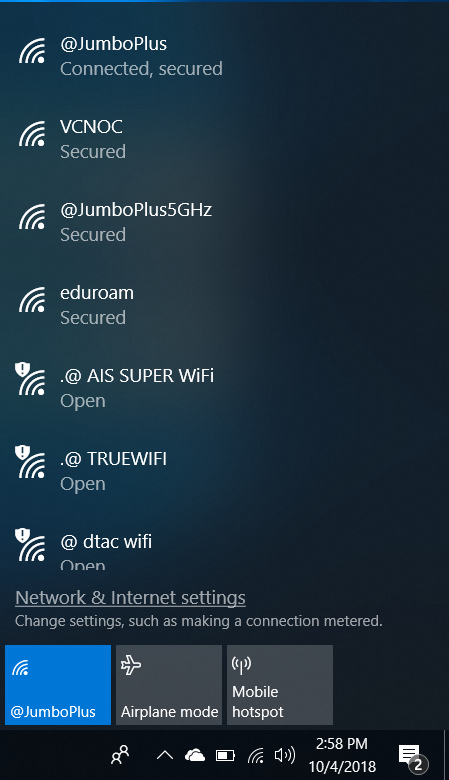
- กดสัญลักษณ์ Wi-Fi ที่ Taskbar (ด้านล่างขวามือ)
 เพื่อเช็คว่าอุปกรณ์เห็นชื่อ Wi-Fi : @JumboPlus หรือ @JumboPlus5GHz
** กรณีเห็น @JumboPlus ชื่อเดียว แสดงว่าอุปกรณ์ของท่านรองรับคลื่นความถี่ 2.4GHz เท่านั้น **
*** กรณีเห็นทั้งสองชื่อ แสดงว่าอุปกรณ์ของท่านรองรับคลื่นความถี่ 5GHz แนะนำให้เลือกเชื่อมต่อที่ @JumboPlus5GHz ***
ให้เลือกสร้างการเชื่อมต่อ Wi-Fi เพียงชื่อเดียวเท่านั้น หากสร้างไว้ทั้งสองชื่อในอุปกรณ์เดียวกัน อาจจะใช้งานแล้วติดๆ หลุดๆ ได้
- On the Windows Security window, enter your CMU Account, which you received from the university, and then click OK
CMU Student : Firstname_Surname@cmu.ac.th
CMU Staff : Firstname.Surname@cmu.ac.th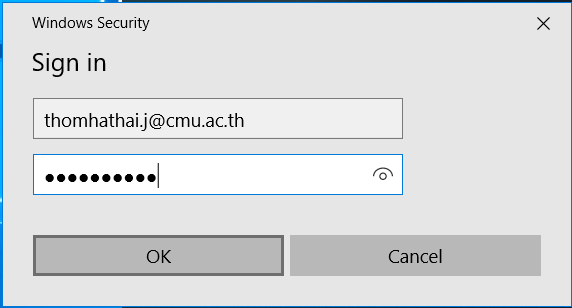
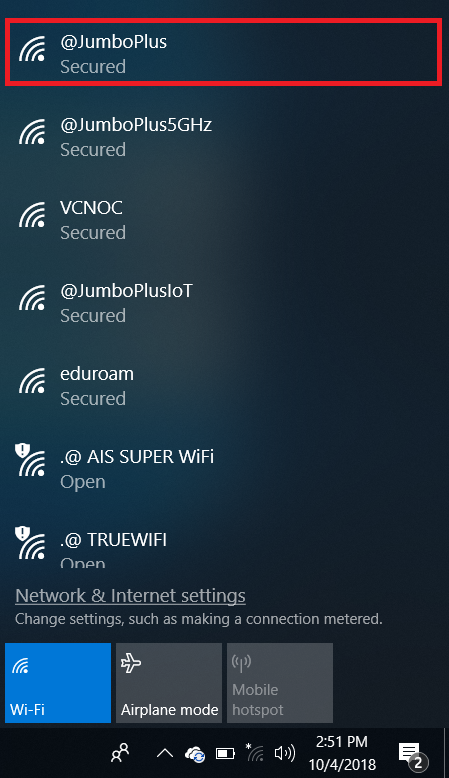
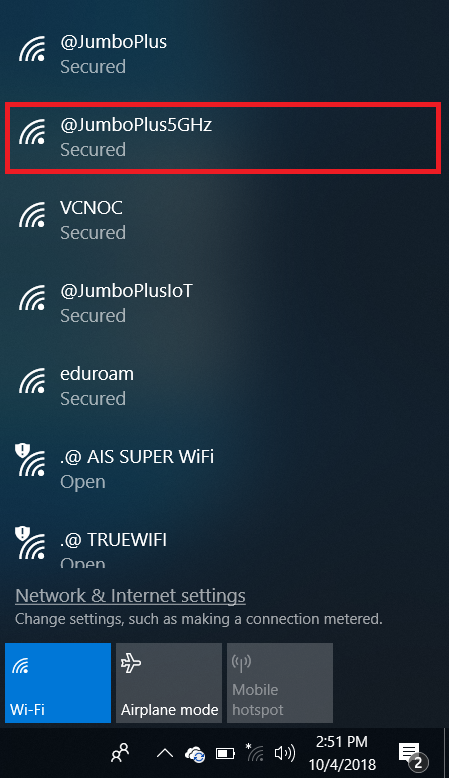
- Click the connectivity icon on the Taskbar.
- Select either @JumboPlus or @JumboPlus5GHz, and then click Connect
- After successfully connecting to @JumboPlus or @JumboPlus5GHz, the device will remember the connection for the next time when in a signal area. The device will automatically connect.