Antivirus (Endpoint Protection)
From CMU ITSC Network
ระบบปฏิบัติการ Windows
ตรวจสอบ System Type ของเครื่องคอมพิวเตอร์
- คลิกขวาที่ This PC หรือ My Computer แล้วเลือก Properties
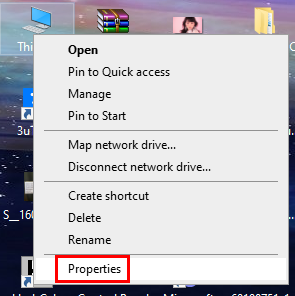
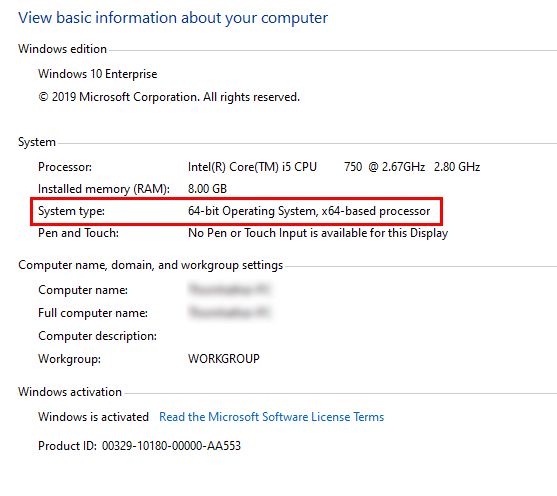
- ดูที่หัวข้อ System Type ว่าเป็น 32 bit หรือ 64 bit เพื่อจะได้เลือก download file ได้ถูกต้อง
การติดตั้ง ESET Endpoint Antivirus
- ไปที่ https://antivirus.cmu.ac.th/ แล้ว Log in ด้วย CMU Account เข้าไป download file ติดตั้งที่ต้องการ
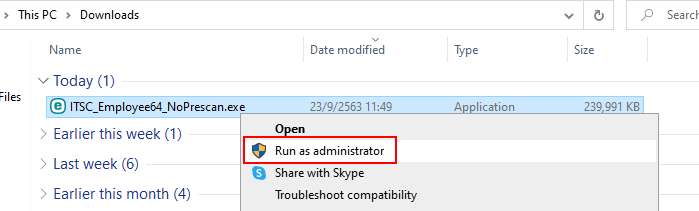
- คลิกขวาที่ file ที่ download เรียบร้อยแล้ว เลือก Run as administrator
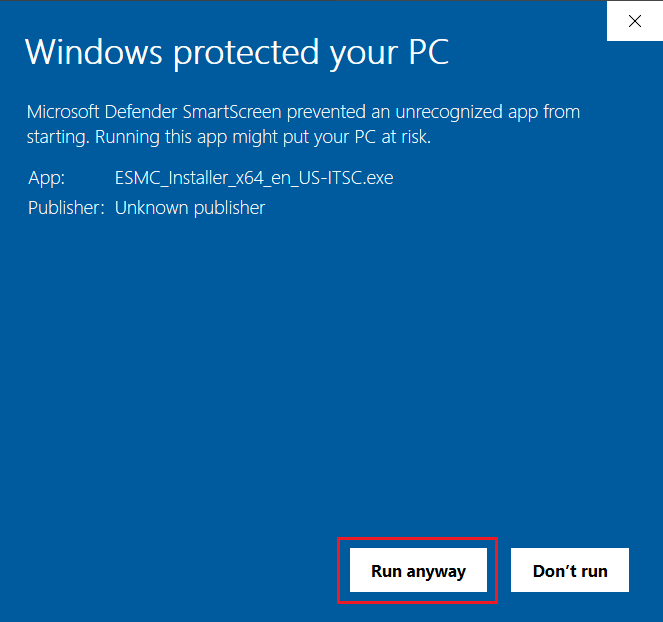
- เมื่อพบหน้าต่าง Windows protected your PC เลือก More Info และ Run anyway
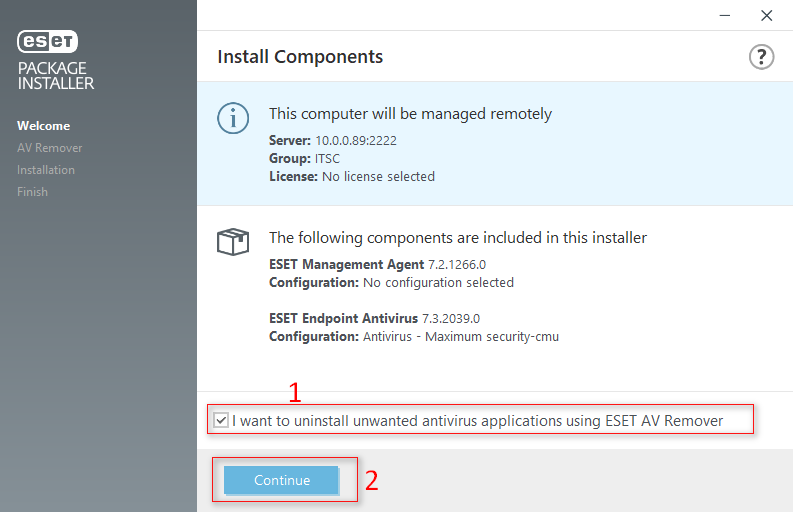
- กรณีเครื่องคอมพิวเตอร์ มีการติดตั้งโปรแกรม Antivirus อื่นอยู่แล้ว ต้องทำการ uninstall ก่อน โดยเลือกที่ข้อความ I want to uninstall unwanted antivirus application using ESET AV Remover จากนั้น คลิก Continue
**หากไม่เคยติดตั้งโปรแกรม Antivirus ในเครื่อง ข้ามไปข้อ 6**
- จะพบหน้าต่างที่แสดงโปรแกรม Antivirus ตัวเดิม คลิกเลือกที่หน้าชื่อโปรแกรม จากนั้นกด Remove รอสักครู่ กด Continue to install
**ทำต่อที่ข้อ 7**

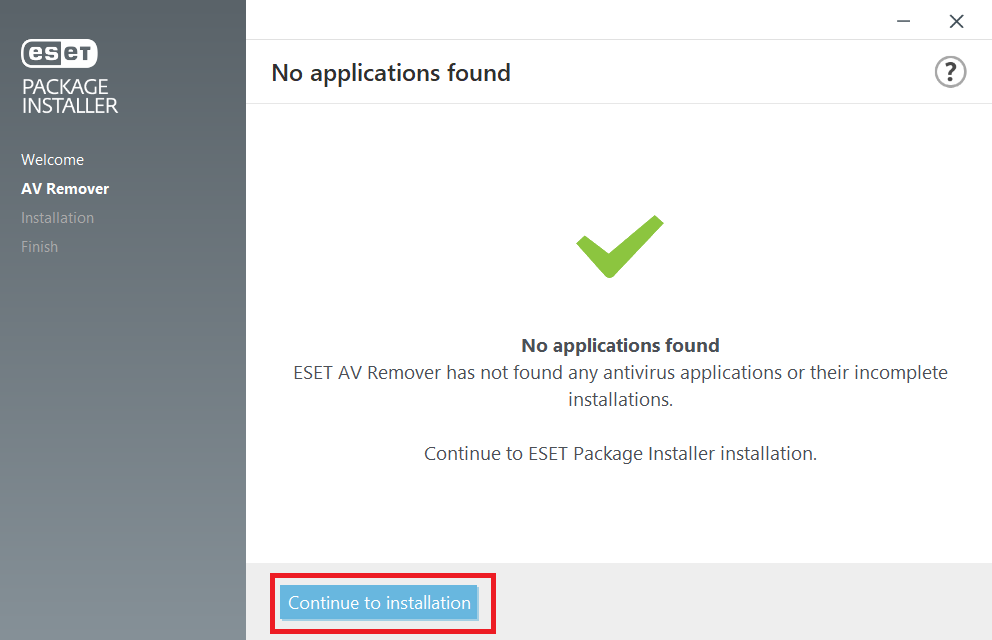
- รอจนกระทั่ง Package Installer ขึ้นมา คลิก Continue

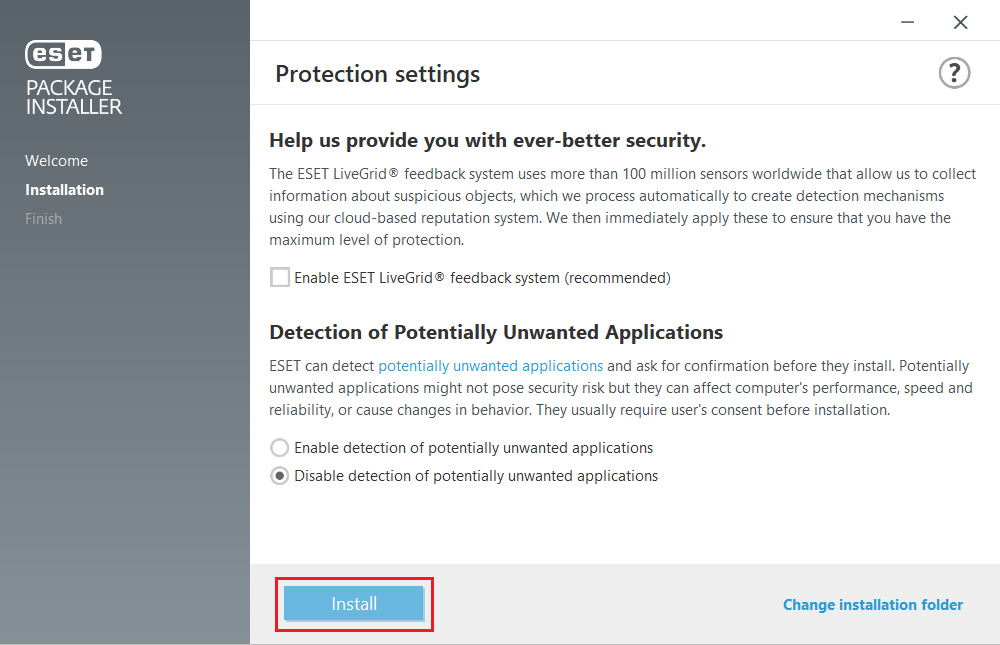
- คลิก Install
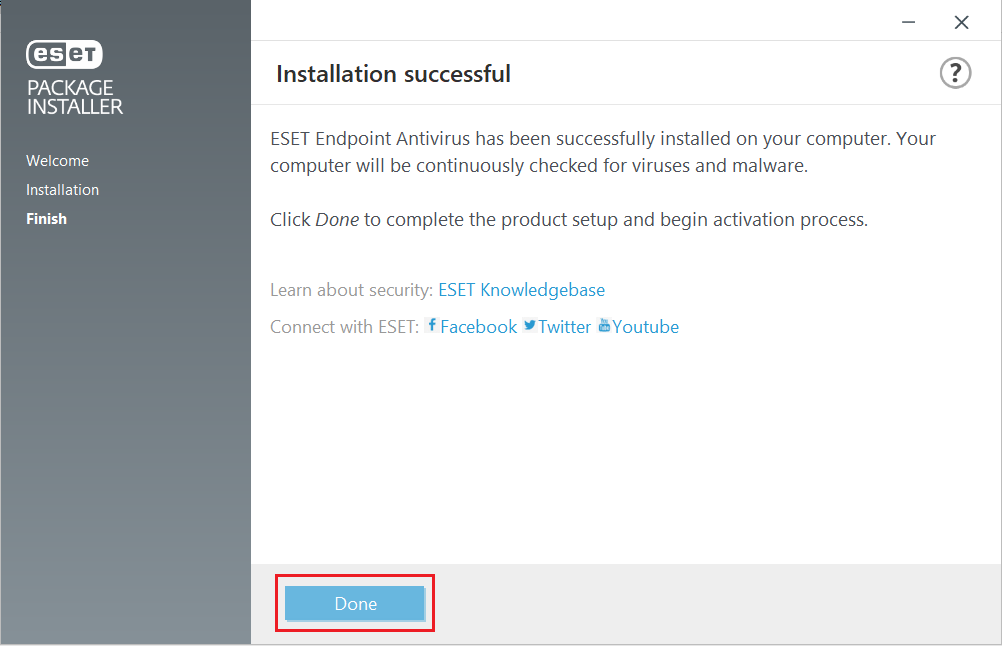
- รอข้อความขึ้นว่า Installation successful คลิก Done
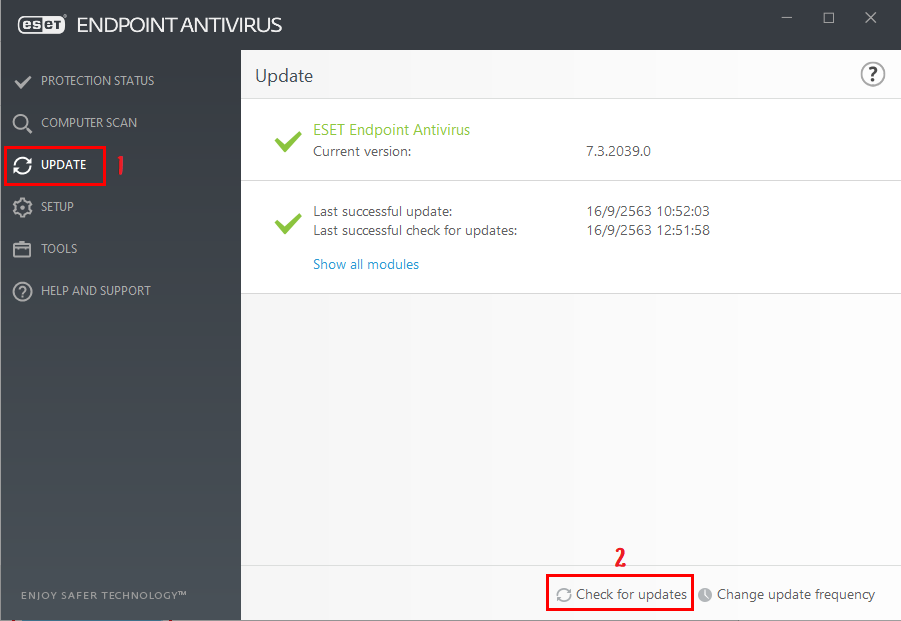
- เปิดโปรแกรม ไปที่ Tab Update ด้านซ้าย เลือก Check for updates
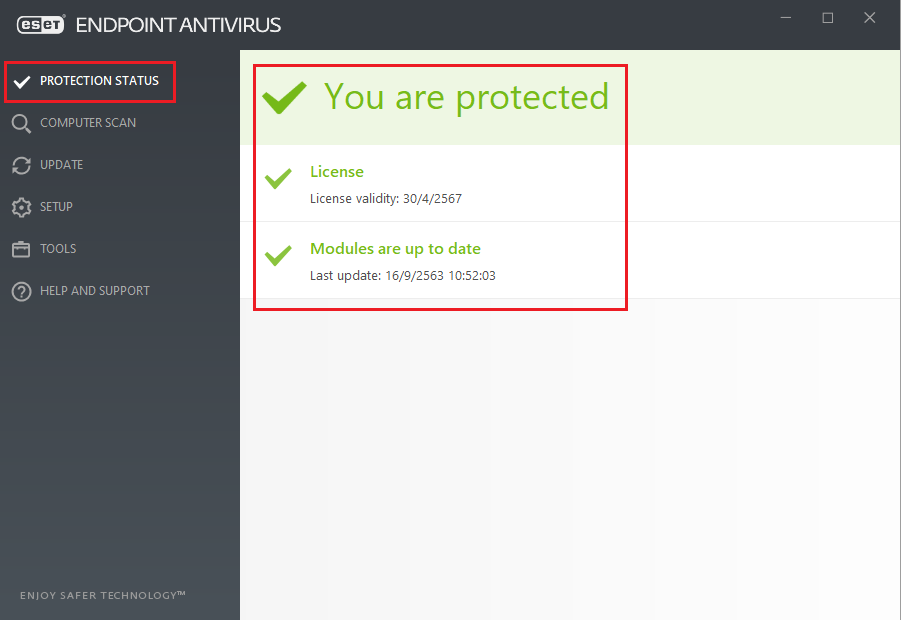
- รอจนการ update เสร็จสิ้น ไปที่ Tab Protection Status จะแสดงการ Activate License สำเร็จ
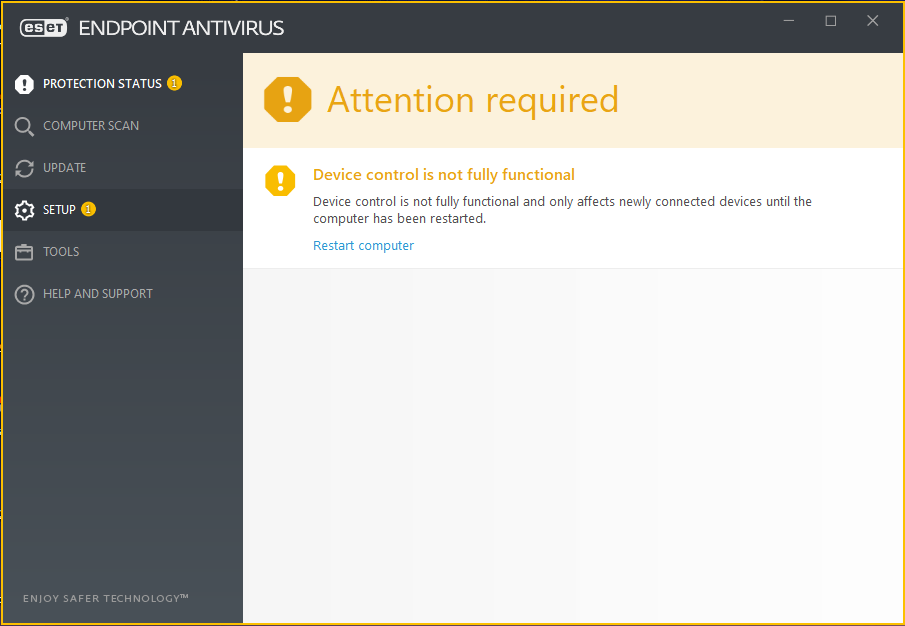
เปิดใช้คำสั่งสแกน Thumb drive หรือ External Hard disk อัตโนมัติ
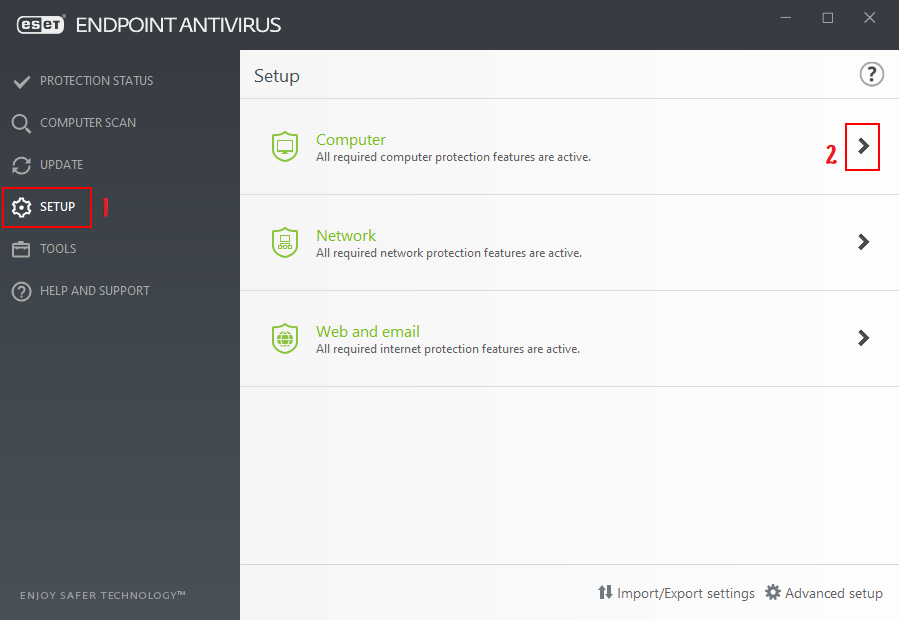
- เปิดโปรแกรม ESET Endpoint Antivirus ไปที่ Tab Set up ในหัวข้อ Computer คลิกสัญลักษณ์ > ท้ายข้อความ
- เปิดใช้งานเมนู Device Control
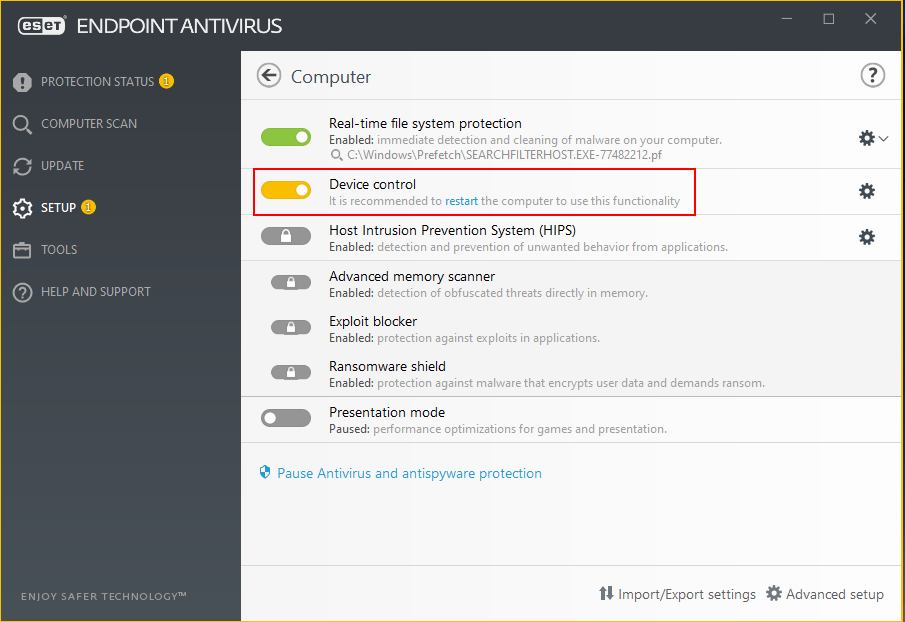
- ทำการ Restart เครื่อง 1 ครั้ง เพื่อให้ระบบทำงานสมบูรณ์
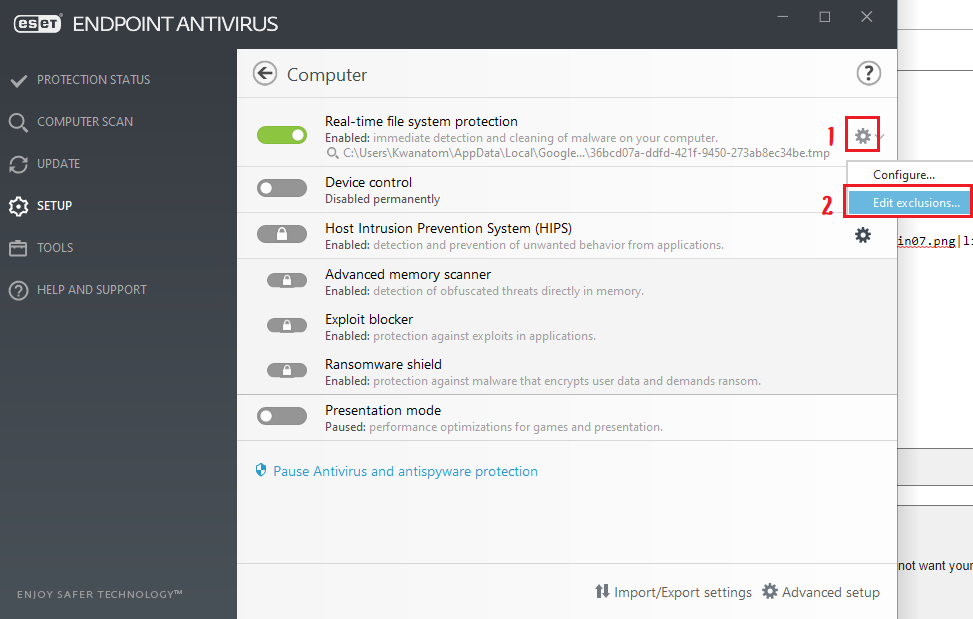
วิธียกเว้นการ Scan หรือ action file ใน Folder ที่กำหนด
- เปิดโปรแกรม ESET Endpoint Antivirus ไปที่ Tab Set up ในหัวข้อ Computer คลิกสัญลักษณ์ > ท้ายข้อความ
- ที่เมนู Real-time file system protection ให้คลิกที่รูปเฟืองด้านท้าย เลือก Edit Exclusion
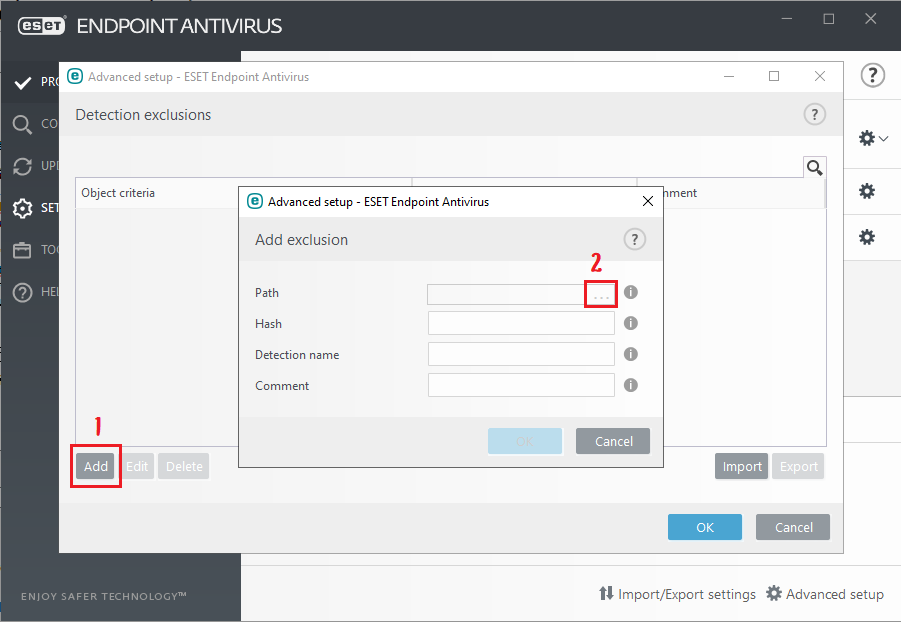
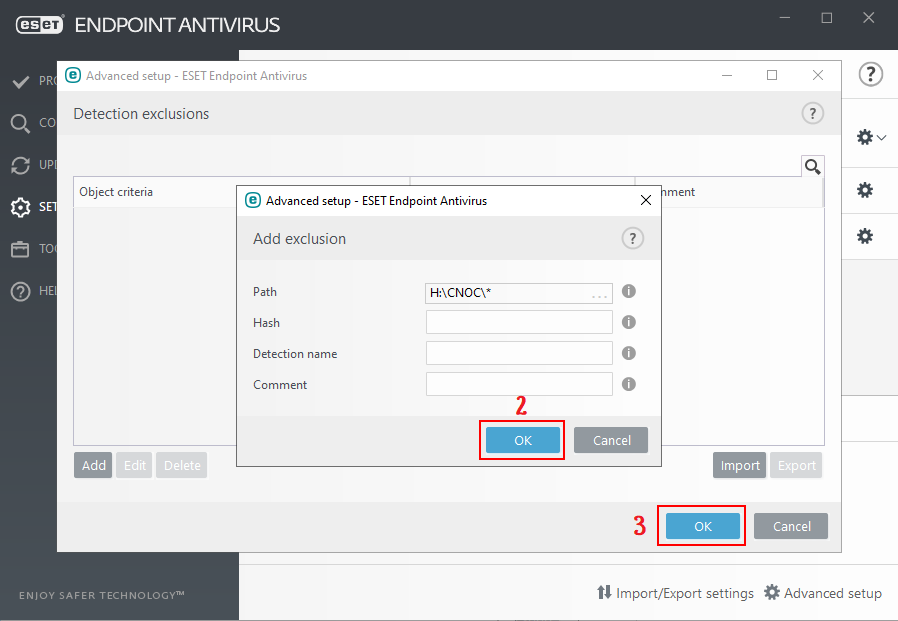
- กด Add จะพบหน้าต่าง Add Exclusion ที่ท้ายหัวข้อ Path คลิกที่สัญลักษณ์ ...
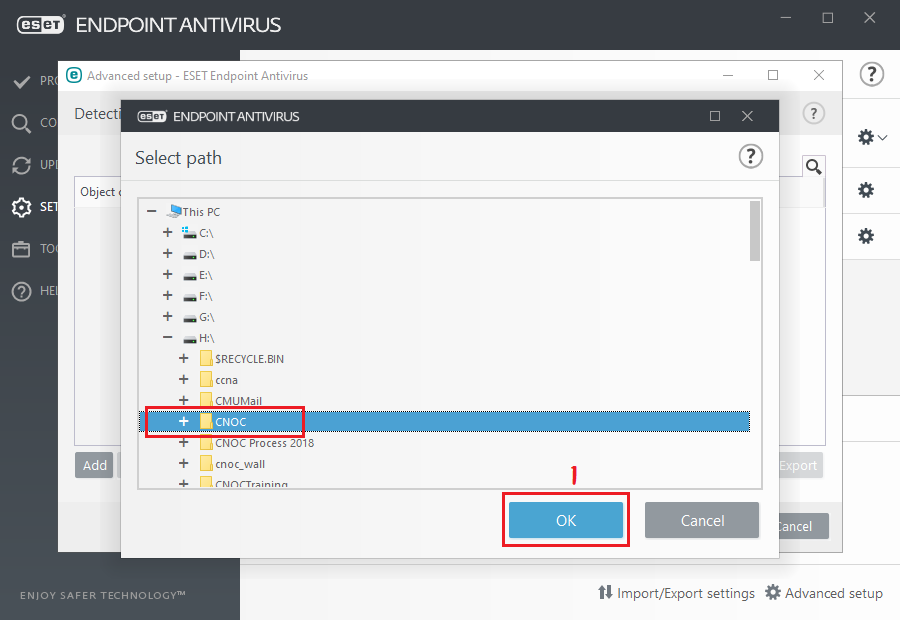
- เลิอก Drive และ Folder ที่ต้องการให้ยกเว้นการ scan จากนั้นกด OK ตามรูป
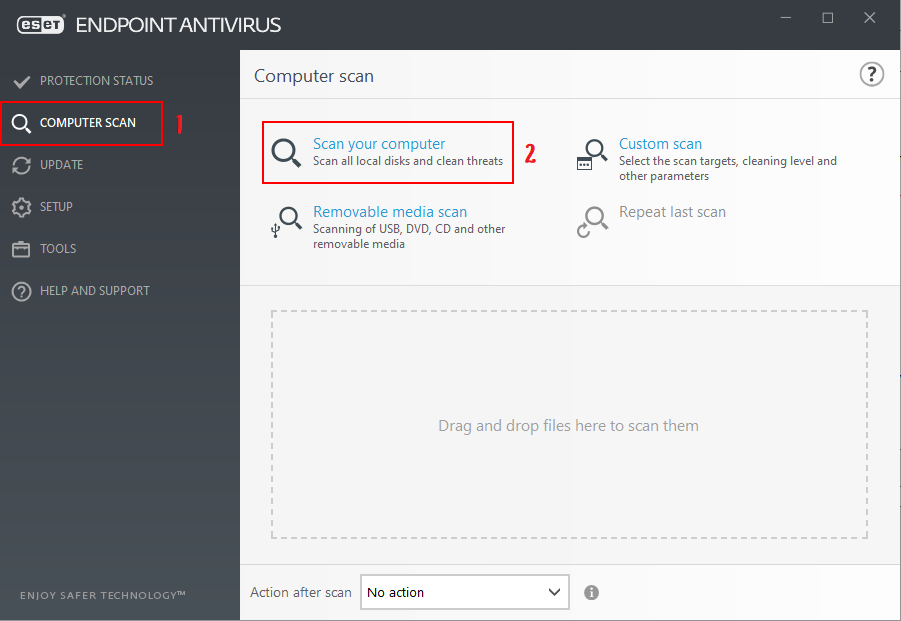
- เลือก Tab Computer scan และเลือกคำสั่ง Scan your computer
ระบบปฏิบัติการ OSX
การติดตั้ง Agent ESET
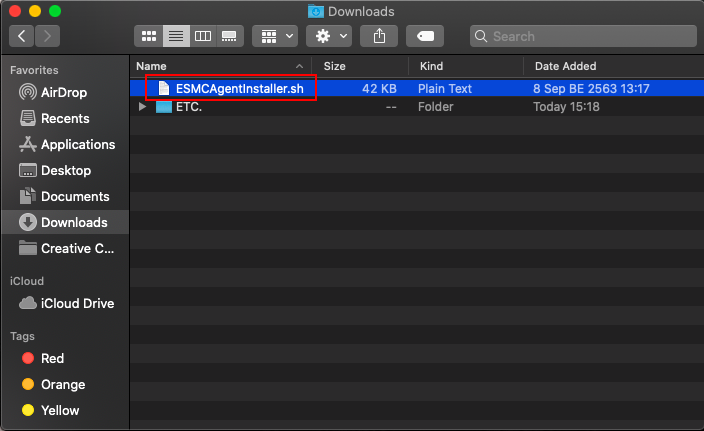
- ไปที่ https://antivirus.cmu.ac.th/ แล้ว Log in ด้วย CMU Account เข้าไป download file ESMCAgentInstaller.sh
- เปิดโปรแกรม Terminal พิมพ์คำสั่ง sudo -i กด Enter ใส่ Password ประจำเครื่อง จะเข้าสู่ root ของเครื่อง
- จากนั้นพิมพ์คำสั่ง cd /users กด Enter จะเข้าสู่ users root
- พิมพ์คำสั่ง ls กด Enter เพื่อตรวจสอบ user ของเครื่อง (ในตัวอย่างคือ cnoc)
- พิมพ์คำสั่ง cd cnoc/Downloads กด Enter เพื่อเข้าสู่ Downloads root
- พิมพ์คำสั่ง ls กด Enter เพื่อตรวจสอบว่ามี file ESMCAgentInstaller.sh อยู่ใน Downloads root จริง
- พิมพ์คำสั่ง chmod 755 ESMCAgentInstaller.sh กด Enter
- พิมพ์คำสั่ง ./ESMCAgentInstaller.sh กด Enter
- ไปที่ Launchpad เพื่อตรวจสอบว่ามี Agent ESET ได้รับการติดตั้งแล้ว
การติดตั้ง ESET Endpoint Antivirus
- ไปที่ https://antivirus.cmu.ac.th/ แล้ว Log in ด้วย CMU Account เข้าไป download file eea_osx_en.dmg
- เมื่อ download เรียบร้อยแล้ว ให้ Double Click ที่ file eea_osx_en.dmg