Windows 8, 8.1
From CMU ITSC Network
Revision as of 03:41, 4 October 2018 by Thomhathai (talk | contribs)
การเชื่อมต่อ @JumboPlus และ @JumboPlus 5 GHz สำหรับ Windows 8 , 8.1
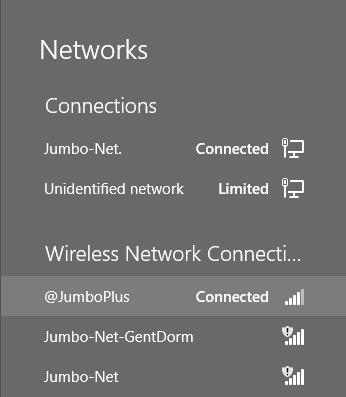
- กดที่ไอคอนการเชื่อมต่อที่ Taskbar (ด้านล่างขวามือ)
 เพื่อเช็คว่าอุปกรณ์เห็นชื่อ Wi-Fi : @JumboPlus หรือ @JumboPlus5GHz
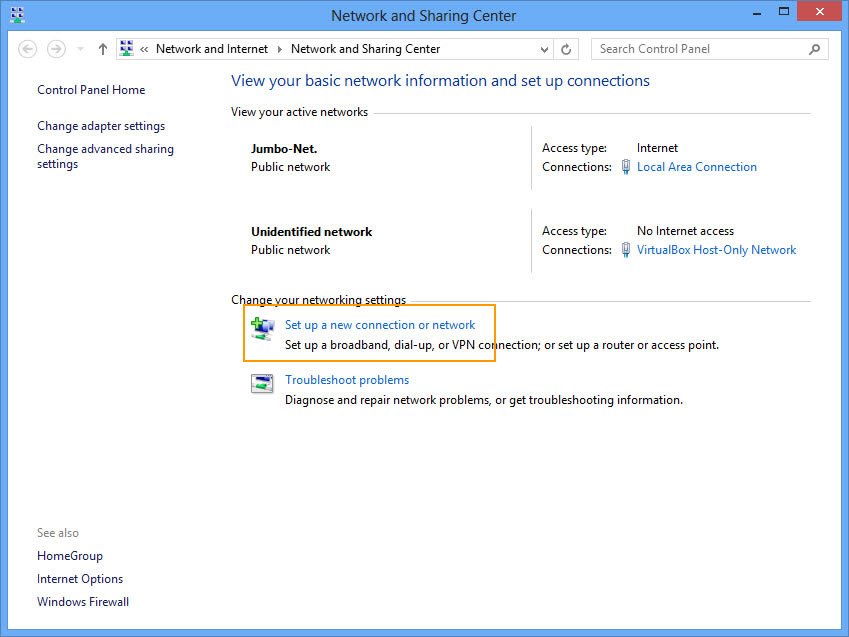
 - คลิกขวาที่ไอคอนการเชื่อมต่อที่ทาสก์บาร์แล้วเลือก "Open Network and Sharing Center"

- ที่หน้าต่าง Network and Sharing Center คลิก "Set up a new connection or network"
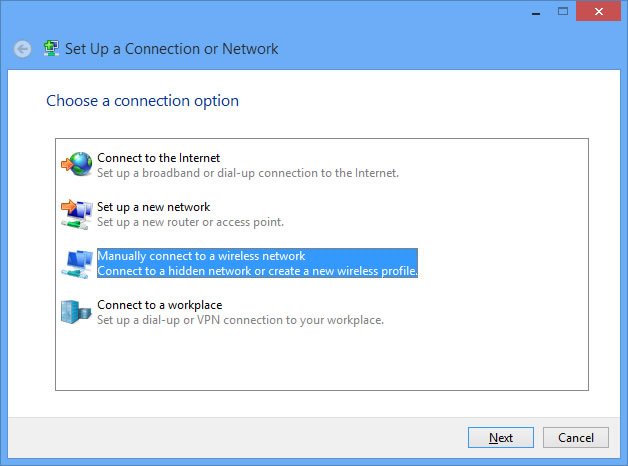
- ที่หน้าต่าง Set Up a Connection or Network เลือก "Manually connect to a wireless network" จากนั้นกด "Next"
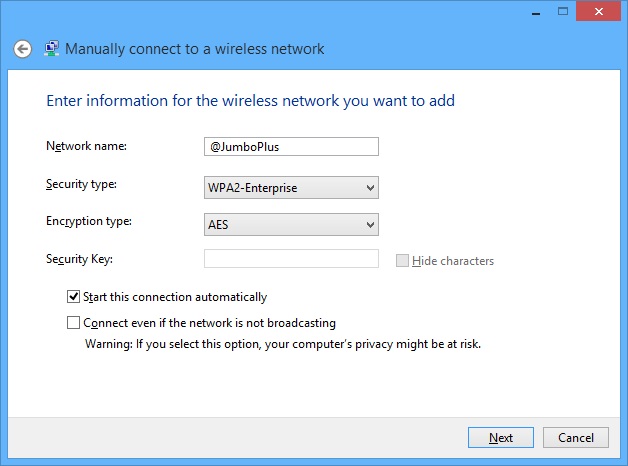
- บนหน้าต่าง Manually connect to a wireless network ตั้งค่าดังนี้
Network name : @JumboPlus หรือ @JumboPlus5GHz (โปรดอ่านหมายเหตุ)
Security type : WPA2-Enterprise
Encryption type : AES
จากนั้นกด "Next"
หมายเหตุ
จากข้อ 1 กรณีเห็น @JumboPlus ชื่อเดียว แสดงว่าอุปกรณ์ของท่านรองรับคลื่นความถี่ 2.4GHz เท่านั้น ต้องใส่ Network name เป็น @JumboPlus
กรณีเห็นทั้งสองชื่อ แสดงว่าอุปกรณ์ของท่านรองรับคลื่นความถี่ 5GHz ให้ใส่ Network name เป็น @JumboPlus5GHz
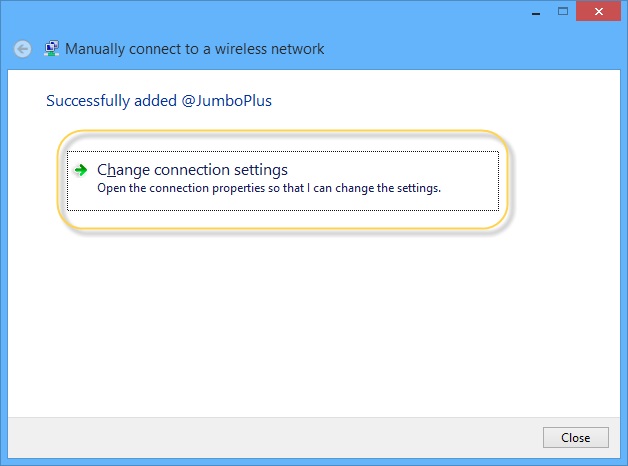
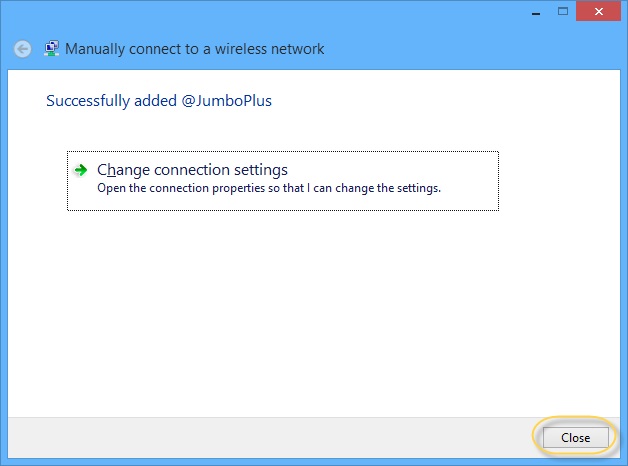
- บนหน้าต่าง Manually connect to a wireless network จะพบข้อความ Successfully added network กด "Change connection settings"
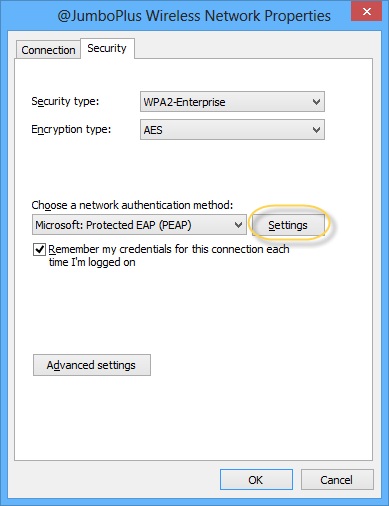
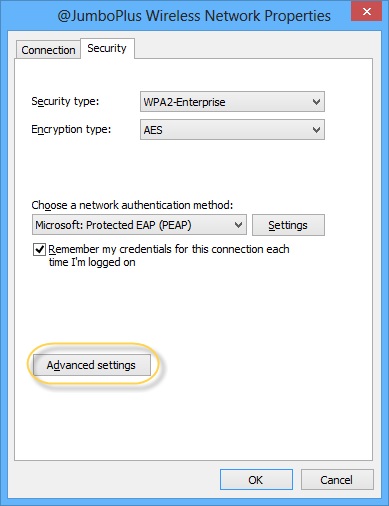
- บนหน้าต่าง Wireless Network Properties เลือกแท็บ "Security" จากนั้นกด "Settings"
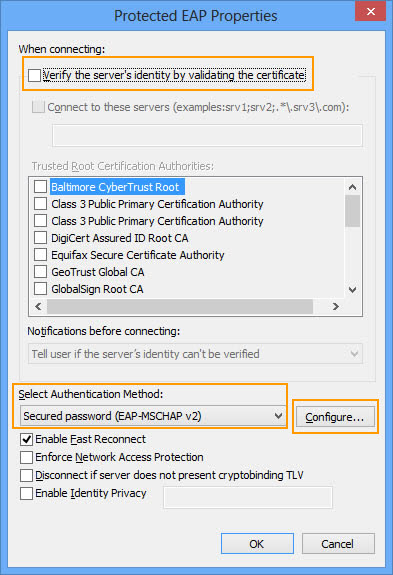
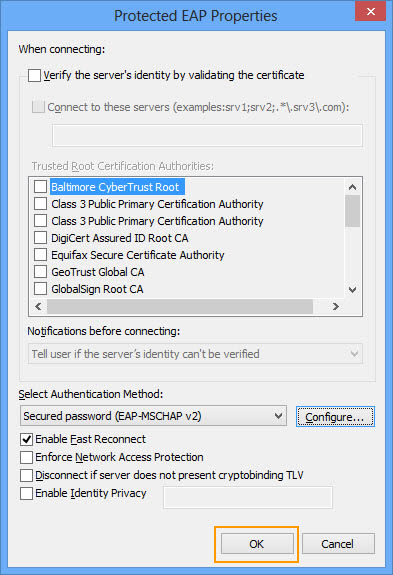
- บนหน้าต่าง Protected EAP Properties ให้นำเครื่องหมายถูกออกจาก "Verify the server's identity by validating the certificate"
ตั้งค่า "Select Authentication Method:" เป็น Secured password (EAP-MSCHAP v2) จากนั้นกด "Configure..."
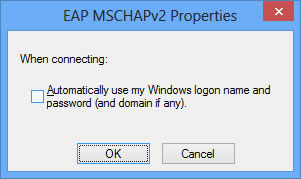
- บนหน้าต่าง EAP MSCHAPv2 Properties ให้นำเครื่องหมายถูกออกจาก "Automatically use my Windows logon name and password (and domain if any)" จากนั้นกด "OK"
- บนหน้าต่าง Protected EAP Properties กด "OK"
- บนหน้าต่าง Wireless Network Properties กด "Advanced settings"
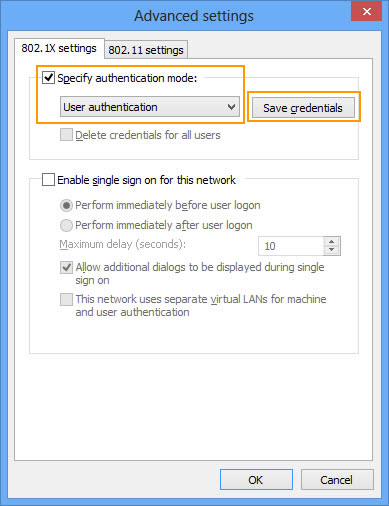
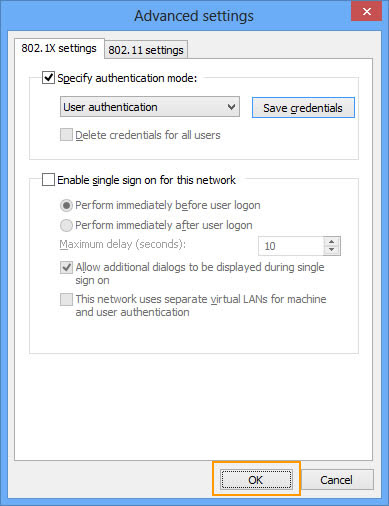
- บนหน้าต่าง Advanced settings เลือก"Specify authentication mode:" และตั้งค่าเป็น "User authentication" จากนั้นกด "Save credentails"
- บนหน้าต่าง Windows Security ระบุ CMU Account ที่ได้รับจากทางมหาวิทยาลัย จากนั้นกด "OK"
นักศึกษา Username : Firstname_Surname@cmu.ac.th
บุคลากร Username : Firstname.Surname@cmu.ac.th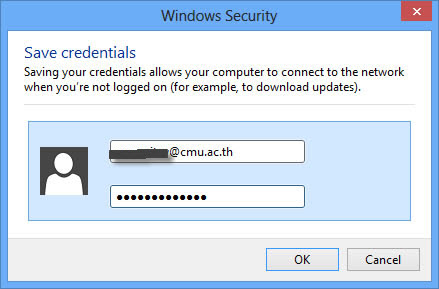
- บนหน้าต่าง Advanced settings กด "OK"
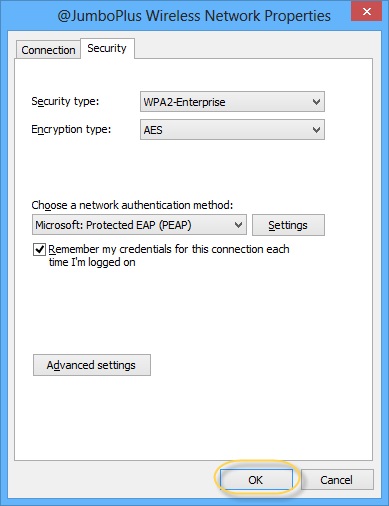
- บนหน้าต่าง Wireless Network Properties กด "OK"
- บนหน้าต่าง Manually connect to a wireless network กด "Close"
- กดไอคอนการเชื่อมต่อที่ Taskbar

- เลือก @JumboPlus หรือ @JumboPlus5GHz จากนั้นกด "Connect"
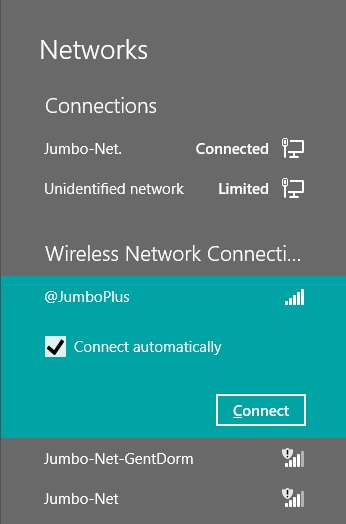
- หลังจากเชื่อมต่อ @JumboPlus หรือ @JumboPlus5GHz สำเร็จแล้ว อุปกรณ์จะจำการเชื่อมต่อไว้ ครั้งต่อไปเมื่ออยู่ในบริเวณที่มีสัญญาณ อุปกรณ์จะทำการเชื่อมต่อโดยอัตโนมัติ
