Difference between revisions of "Windows 10"
From CMU ITSC Network
Thomhathai (talk | contribs) |
Thomhathai (talk | contribs) |
||
| Line 1: | Line 1: | ||
<h2><b> การเชื่อมต่อ @JumboPlus5GHz สำหรับ Windows 10 </b></h2> <br/><br/> | <h2><b> การเชื่อมต่อ @JumboPlus5GHz สำหรับ Windows 10 </b></h2> <br/><br/> | ||
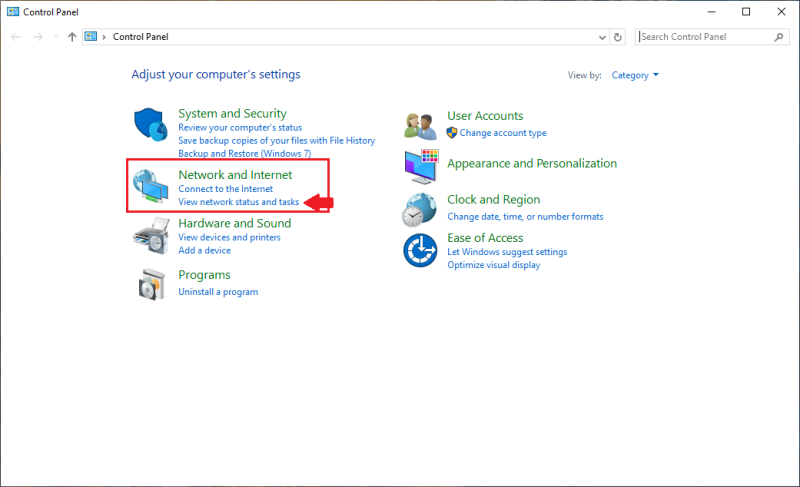
* เปิด Control Panel ที่หัวข้อ Network and Internet คลิกที่ '''View Network status and tasks''' | * เปิด Control Panel ที่หัวข้อ Network and Internet คลิกที่ '''View Network status and tasks''' | ||
| − | <br/> [[File:่001win10.png | link=]]<br/> | + | <br/> [[File:่001win10.png |800px| link=]]<br/> |
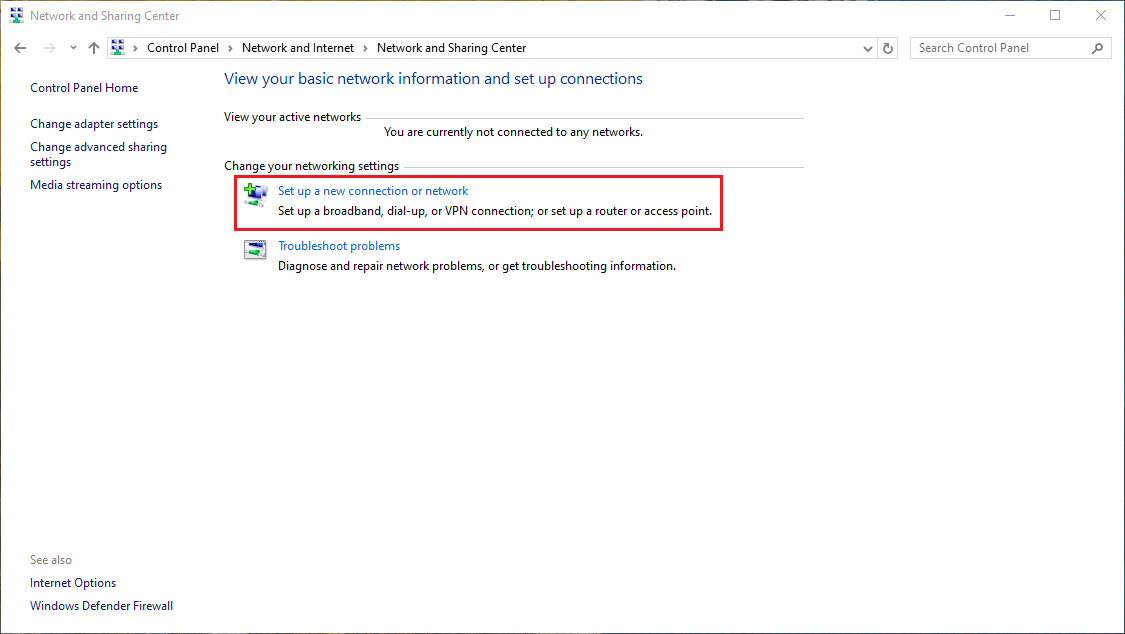
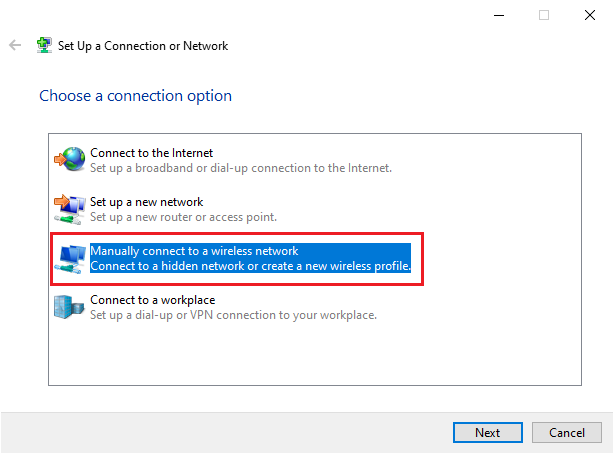
* เลือก '''Set up a new connection or network''' และ เลือก '''Manually connect to a wireless network''' | * เลือก '''Set up a new connection or network''' และ เลือก '''Manually connect to a wireless network''' | ||
<br/> [[File:002win10.PNG | link=]]<br/> <br/> [[File:003win10.PNG | link=]]<br/> | <br/> [[File:002win10.PNG | link=]]<br/> <br/> [[File:003win10.PNG | link=]]<br/> | ||
Revision as of 09:43, 5 August 2025
การเชื่อมต่อ @JumboPlus5GHz สำหรับ Windows 10
- เปิด Control Panel ที่หัวข้อ Network and Internet คลิกที่ View Network status and tasks
- เลือก Set up a new connection or network และ เลือก Manually connect to a wireless network
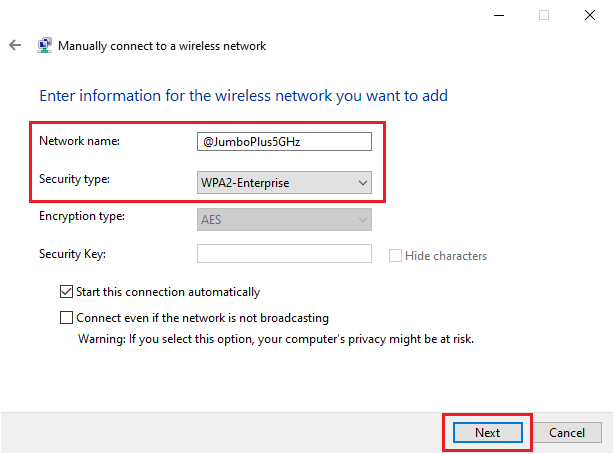
- ในหัวข้อ Network name กรอก @JumboPlus5GHz และในหัวข้อ Security type เลือก WPA2-Enterprise จากนั้นกด Next
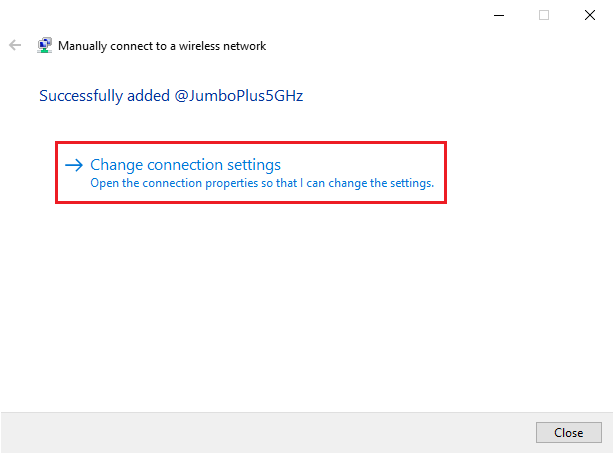
- เลือก Change connection settings
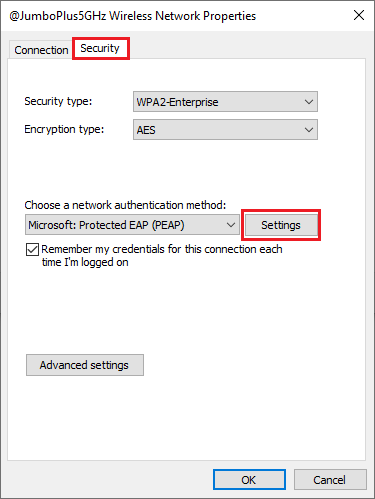
- คลิกที่ Tab Security ในหัวข้อ Choose a network authentication method กด settings
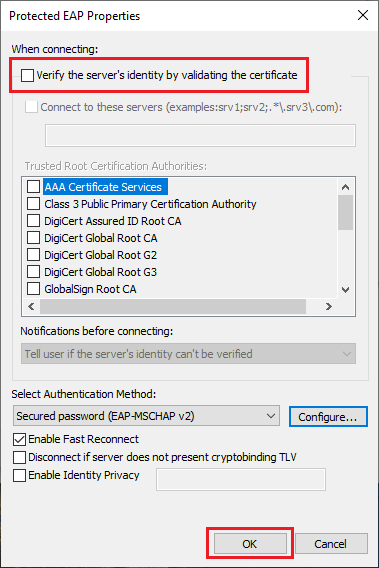
- ที่หัวข้อ When connecting นำเครื่องหมายถูกข้างหน้าข้อความ Verify the server's identity by validating the certificate จากนั้นคลิก OK
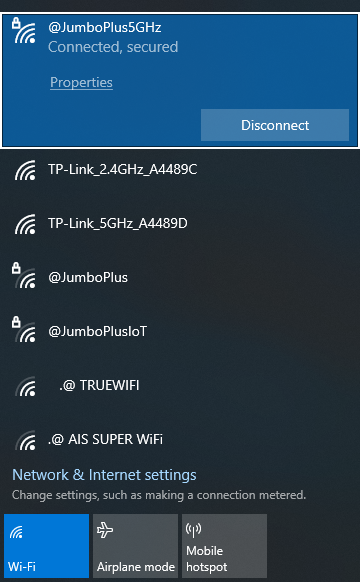
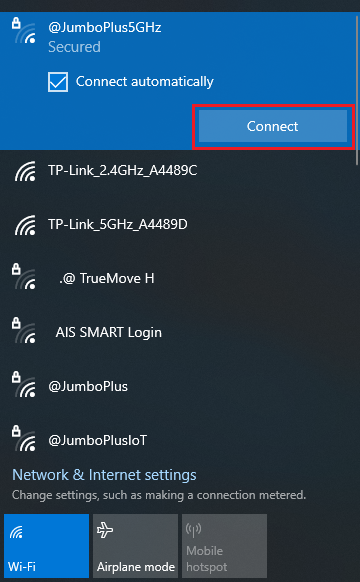
- จากนั้นในหน้าต่างการเชื่อมต่อ Wi-Fi กด connect ที่ชื่อ @JumboPlus5GHz
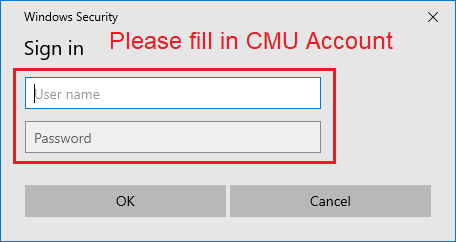
- กรอก CMU Account และกด OK
- หลังจากเชื่อมต่อ @JumboPlus5GHz สำเร็จแล้ว อุปกรณ์จะจำการเชื่อมต่อไว้ ครั้งต่อไปเมื่ออยู่ในบริเวณที่มีสัญญาณ อุปกรณ์จะทำการเชื่อมต่อโดยอัตโนมัติ