Difference between revisions of "Loadbalance with Keepalived Nginx"
| Line 12: | Line 12: | ||
=== Network Scenario === | === Network Scenario === | ||
| − | # Server 1 : 10.0.0. | + | # Server 1 : 10.0.0.1 |
| − | # Server 2 : 10.0.0. | + | # Server 2 : 10.0.0.2 |
| − | # Virtual IP : 10.0.0. | + | # Virtual IP : 10.0.0.3 |
<br> | <br> | ||
| Line 25: | Line 25: | ||
<br> | <br> | ||
| − | === Step 2 | + | === Step 2 - Setup Nginx TCP Balancing=== |
| − | |||
| − | |||
| − | |||
| − | |||
| − | |||
| − | |||
| − | |||
| − | |||
| − | |||
| − | |||
| − | |||
| − | |||
| − | |||
| − | |||
| − | |||
| − | |||
| − | |||
| − | |||
| − | |||
| − | |||
| − | |||
| − | |||
| − | |||
| − | |||
| − | |||
| − | |||
| − | |||
| − | |||
| − | |||
| − | |||
| − | |||
| − | |||
| − | |||
| − | |||
| − | |||
| − | |||
| − | |||
| − | |||
| − | |||
| − | |||
| − | |||
| − | |||
| − | |||
ทำการแก้ไขไฟล์ nginx configuration ใน /etc/nginx/nginx.conf ของเครื่อง server ทั้งสองให้เหมือนกัน | ทำการแก้ไขไฟล์ nginx configuration ใน /etc/nginx/nginx.conf ของเครื่อง server ทั้งสองให้เหมือนกัน | ||
| Line 97: | Line 54: | ||
</syntaxhighlight> | </syntaxhighlight> | ||
| − | ทดสอบการทำงาน Loadbalance ของ Nginx โดยเข้าผ่าน Virtual IP (10.0.0. | + | ทดสอบการทำงาน Loadbalance ของ Nginx โดยเข้าผ่าน Virtual IP (10.0.0.3) <br> |
หรือใช้คำสั่ง (Shell) $ while true; do (date +%r); curl 10.0.0.1; sleep 1; done <br> | หรือใช้คำสั่ง (Shell) $ while true; do (date +%r); curl 10.0.0.1; sleep 1; done <br> | ||
[[File:NginxBrowser.gif | link=]] [[File:NginxCURL.gif | link=]] <br> | [[File:NginxBrowser.gif | link=]] [[File:NginxCURL.gif | link=]] <br> | ||
| Line 111: | Line 68: | ||
''' Server 1 ''' | ''' Server 1 ''' | ||
<syntaxhighlight lang=Vim Script highlight="14,22,24,27"> | <syntaxhighlight lang=Vim Script highlight="14,22,24,27"> | ||
| − | |||
| − | |||
| − | |||
| − | |||
| − | |||
| − | |||
vrrp_script chk_nginx { | vrrp_script chk_nginx { | ||
script "/usr/bin/killall -0 nginx" | script "/usr/bin/killall -0 nginx" | ||
| Line 132: | Line 83: | ||
auth_pass 1111 | auth_pass 1111 | ||
} | } | ||
| − | unicast_src_ip 10.0.0. | + | unicast_src_ip 10.0.0.1 |
unicast_peer { | unicast_peer { | ||
| − | 10.0.0. | + | 10.0.0.2 |
} | } | ||
virtual_ipaddress { | virtual_ipaddress { | ||
| Line 140: | Line 91: | ||
} | } | ||
track_script { | track_script { | ||
| − | |||
chk_nginx | chk_nginx | ||
} | } | ||
| Line 148: | Line 98: | ||
''' Server 2 ''' | ''' Server 2 ''' | ||
<syntaxhighlight lang=Vim Script highlight="14,22,24,27> | <syntaxhighlight lang=Vim Script highlight="14,22,24,27> | ||
| − | |||
| − | |||
| − | |||
| − | |||
| − | |||
| − | |||
vrrp_script chk_nginx { | vrrp_script chk_nginx { | ||
script "/usr/bin/killall -0 nginx" | script "/usr/bin/killall -0 nginx" | ||
| Line 169: | Line 113: | ||
auth_pass 1111 | auth_pass 1111 | ||
} | } | ||
| − | unicast_src_ip 10.0.0. | + | unicast_src_ip 10.0.0.2 |
unicast_peer { | unicast_peer { | ||
| − | 10.0.0. | + | 10.0.0.1 |
} | } | ||
virtual_ipaddress { | virtual_ipaddress { | ||
| − | 10.0.0. | + | 10.0.0.3 |
} | } | ||
track_script { | track_script { | ||
| − | |||
chk_nginx | chk_nginx | ||
} | } | ||
Revision as of 08:52, 1 July 2020
Introduction
- การทำ High availbility จะต้องมีส่วนประกอบที่สามารถเปลี่ยนเส้นทางงานและจะต้องมีกลไกในการตรวจสอบความล้มเหลวและการเปลี่ยนระบบหากตรวจพบการหยุดชะงัก โดยจะใช้ระบบของ Keepalived
- Keepalived ทำหน้าที่ในการตรวจสอบสถานะของเครื่อง เมื่อเกิดการ Failover ระบบจะเปลี่ยนเส้นทางไปยังอีกระบบหนึ่งที่สแตนบายอยู่โดยอัตโนมัติ เมื่อตัวหลักหยุดทำงาน Floating IP จะย้ายไปยังตัวที่สองโดยอัตโนมัติเพื่อให้บริการต่อ โดยใช้โปรโตคอล VRRP (Virtual Router Redundancy Protocol)
- การตั้งค่า Priority เป็นตัวกำหนดว่าจะให้เครื่องไหนเป็น Master หรือ Backup
- - MASTER-MASTER คือ มีค่า Priority เท่ากัน เมื่อเครื่องที่ 1 พังจะย้ายไปเครื่องที่ 2 และเมื่อเครื่องที่ 1 ดีการทำงานก็จะยังคงอยู่ที่เครื่องที่ 2
- - MASTER-BACKUP คือ มีค่า Priority ต่างกัน เมื่อเครื่องที่ 1 พังจะย้ายไปเครื่องที่ 2 และเมื่อเครื่องที่ 1 ดีการทำงานก็จะย้ายไปเครื่องที่ 1 แทน

Lab setup
ในการทำแลปนี้จะเป็นการทำแบบ MASTER-MASTER และเมื่อเครื่องที่ 1 ขัดข้องระบบก็จะเปลี่ยนไปใช้เครื่องที่ 2 แทน โดยมีอีกส่วนทีให้เช็คค่าด้วยคือ เมื่อระบบยังดีแต่ nginx ล่มหรือขัดข้องให้ทำการเปลี่ยนเครื่องด้วยเหมือนนัน
Network Scenario
- Server 1 : 10.0.0.1
- Server 2 : 10.0.0.2
- Virtual IP : 10.0.0.3
Step 1 - Install Packages
$ sudo apt-get install haproxy
$ sudo apt-get install keepalived
$ sudo apt-get install nginx
Step 2 - Setup Nginx TCP Balancing
ทำการแก้ไขไฟล์ nginx configuration ใน /etc/nginx/nginx.conf ของเครื่อง server ทั้งสองให้เหมือนกัน
$ sudo vi /etc/nginx/nginx.conf
stream {
        upstream ubuntu {
                server 10.0.0.10:80;
                server 10.0.0.11:80;
        }
        server {
                listen 80;
                proxy_pass ubuntu;
        }
}
กำหนดค่าให้เริ่มทำงานอัตโนมัติเมื่อระบบรีบูต
$ sudo systemctl enable nginx
ทำการรีสตาร์ท nginx เพื่อให้ค่า config ล่าสุดทำงาน
$ sudo service nginx restart
ทดสอบการทำงาน Loadbalance ของ Nginx โดยเข้าผ่าน Virtual IP (10.0.0.3)
หรือใช้คำสั่ง (Shell) $ while true; do (date +%r); curl 10.0.0.1; sleep 1; done


Step 4 - Setup Keepalived
ทำการแก้ไขไฟล์ keepalived configuration ใน /etc/keepalived/keepalived.conf ของเครื่อง server
$ sudo vi /etc/keepalived/keepalived.conf- อัพเดทค่าที่ไฮไลท์ด้วยระบบของคุณ
Server 1
vrrp_script chk_nginx {
    script "/usr/bin/killall -0 nginx"
    interval 2
}

vrrp_instance VI_1 {
    state MASTER
    interface ens3
    virtual_router_id 101
    priority 110
    advert_int 1
    authentication {
        auth_type PASS
        auth_pass 1111
    }
    unicast_src_ip 10.0.0.1
    unicast_peer {
        10.0.0.2
    }
    virtual_ipaddress {
        10.0.0.1
    }
    track_script {
        chk_nginx
    }
}
Server 2
vrrp_script chk_nginx {
    script "/usr/bin/killall -0 nginx"
    interval 2
}

vrrp_instance VI_1 {
    state MASTER
    interface ens3
    virtual_router_id 101
    priority 110
    advert_int 1
    authentication {
        auth_type PASS
        auth_pass 1111
    }
    unicast_src_ip 10.0.0.2
    unicast_peer {
        10.0.0.1
    }
    virtual_ipaddress {
        10.0.0.3
    }
    track_script {
        chk_nginx
    }
}
กำหนดค่าให้เริ่มทำงานอัตโนมัติเมื่อระบบรีบูต
$ sudo systemctl enable keepalived
ทำการรีสตาร์ท keepalived เพื่อให้ค่า config ล่าสุดทำงาน
$ sudo service keepalived restart
เพิ่มเติม : ส่วนกำหนดเงื่อนไขเมื่อ nginx หรือ haproxy เกิดขัดข้องให้ทำการเปลี่ยนเส้นทางการทำงานไปยังอีกเครื่อง
vrrp_script chk_haproxy {
    script "killall -0 haproxy"
    interval 2
    weight 2
}

vrrp_script chk_nginx {
    script "/usr/bin/killall -0 nginx"
    interval 2
}
    track_script {
        chk_haproxy
        chk_nginx
    }
อ้างอิง
https://www.nginx.com/blog/tcp-load-balancing-udp-load-balancing-nginx-tips-tricks/
https://tecadmin.net/setup-ip-failover-on-ubuntu-with-keepalived/
https://medium.com/@xmikex83/how-to-setup-an-highly-available-load-balancer-with-keepalived-and-haproxy-on-ubuntu-18-04-8bab7b77f715
https://dasunhegoda.com/how-to-setup-haproxy-with-keepalived/833/
ผลการทดสอบ
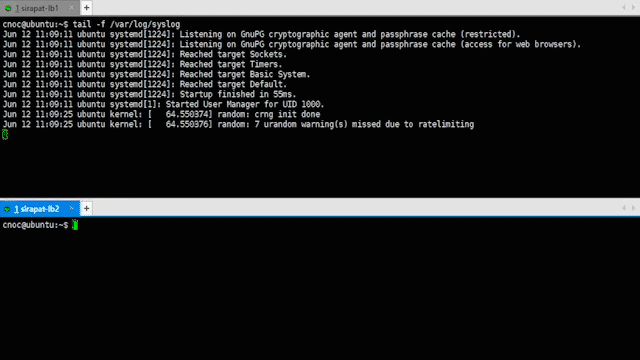
ตรวจสอบการทำงานจากคำสั่ง
$ tail -f /var/log/syslog
1. ทดสอบโดยการหยุดการใช้งาน Nginx เครื่องที่ 2 (ขณะนี้เครื่องที่ 2 เป็น MASTER State)
เครื่องที่ 2
$ sudo service nginx top
สังเกตุเห็นได้ว่าเมื่อ Nginx พังลง เครื่องที่ 1 ก็ทำการขึ้นเป็น MASTER แทน
2. ทดสอบปิดเครื่องที่ยังเป็น MASTER อยู่
เครื่องที่ 1
& sudo poweroff

เมื่อทำการปิดเครื่องที่ 1 เครื่องที่ 2 ก็ทำการขึ้นเป็น MASTER แทน