Difference between revisions of "Windows 10 EN"
Thomhathai (talk | contribs) |
|||
| (4 intermediate revisions by 2 users not shown) | |||
| Line 1: | Line 1: | ||
<h2><b> Connecting to @JumboPlus5GHz on Windows 10 </b></h2> <br/><br/> | <h2><b> Connecting to @JumboPlus5GHz on Windows 10 </b></h2> <br/><br/> | ||
| − | Open the Control Panel, go to Network and Internet, | + | # Open the '''Control Panel''', go to '''Network and Internet''', then click '''View network status and tasks'''. |
| − | <br/> [[File:่001win10.png |800px| link=]]<br/> | + | <br/> [[File:่001win10.png |800px| link=]] <br/><br/> |
| + | 2. Select '''Set up a new connection or network''', then choose '''Manually connect to a wireless network''' | ||
| + | <br/><br/> [[File:002win10.PNG |800px|link=]]<br/> <br/> [[File:003win10.PNG | link=]]<br/><br/> | ||
| + | 3. In the '''Network name''' field, enter '''@JumboPlus5GHz''', and under '''Security type''', select '''WPA2-Enterprise''' then click '''Next'''. | ||
| + | <pre style="color: red"> | ||
| + | If your device does not support the 5GHz frequency band, enter '''@JumboPlus''' in the Network name field instead. Please ensure you use the correct uppercase and lowercase letters as shown. | ||
| − | + | If you're using the network in a university dormitory with an Access Point in your room, make sure to spell the network name correctly according to your room number, e.g., JumboPlus_BuildingName_RoomNumber | |
| − | < | + | </pre>[[File:004win10.PNG | link=]]<br/><br/> |
| − | + | 4. Select '''Change connection settings''' | |
| − | + | <br/><br/> [[File:005win10.PNG | link=]]<br/><br/> | |
| − | <br/> [[File: | + | 5. Click the '''Security''' tab. Under ''Choose a network authentication method'', click '''Settings'''. |
| − | + | <br/><br/> [[File:006win10.PNG | link=]]<br/><br/> | |
| − | + | 6. In the '''When connecting''' section, '''uncheck''' the box next to ''Verify the server's identity by validating the certificate'', then click '''OK'''. | |
| − | <br/> | + | <br/><br/> [[File:007win10.PNG | link=]]<br/><br/> |
| − | + | 7. Go to "Advanced setting" | |
| − | + | <br/><br/> [[File:012win10.png | link=]]<br/><br/> | |
| − | <br/> [[File:006win10.PNG | link=]]<br/> | + | 8. Check '''Specify authentication mode''', select '''User authentication''', and click '''Save credentials''' |
| − | + | <br/><br/> [[File:013win10.png | link=]]<br/><br/> | |
| − | + | 9. On the '''Windows Security''' pop-up, enter your '''CMU Account''' provided by the university, then click '''OK'''. <br/> CMU Student : Firstname_Surname@cmu.ac.th <br/> CMU Staff : Firstname.Surname@cmu.ac.th <br/><br/> | |
| − | <br/> [[File:007win10.PNG | link=]]<br/> | + | <br/> [[File:014win10.png| link=]]<br/><br/> |
| − | + | 10. Click '''OK''' | |
| − | + | <br/><br/> [[File:015win10.png | link=]] [[File:016win10.png | link=]]<br/><br/> | |
| − | <br/> [[File: | + | 9. Once connected to '''@JumboPlus5GHz''', your device will remember the network. It will automatically connect whenever you're in range. |
| − | + | <br/><br/> [[File:011win10.png| link=]]<br/> | |
| − | |||
| − | <br/> [[File: | ||
| − | |||
| − | |||
| − | <br/> [[File:011win10.png| link=]]<br/> | ||
Latest revision as of 03:36, 8 August 2025
Connecting to @JumboPlus5GHz on Windows 10
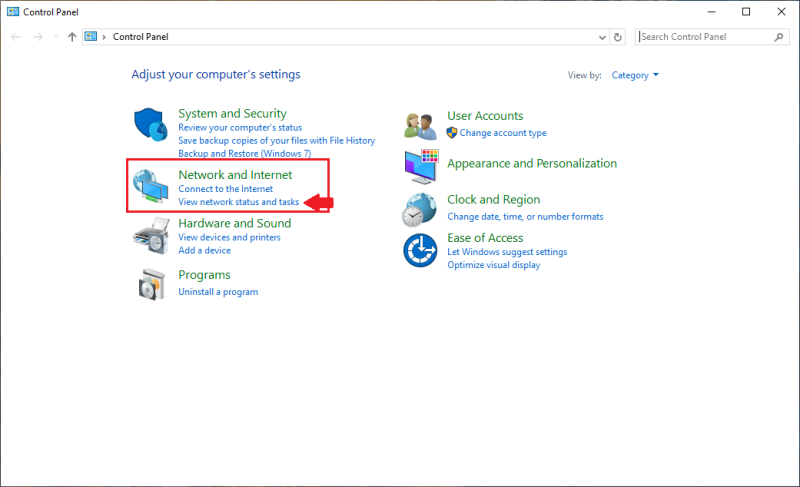
- Open the Control Panel, go to Network and Internet, then click View network status and tasks.
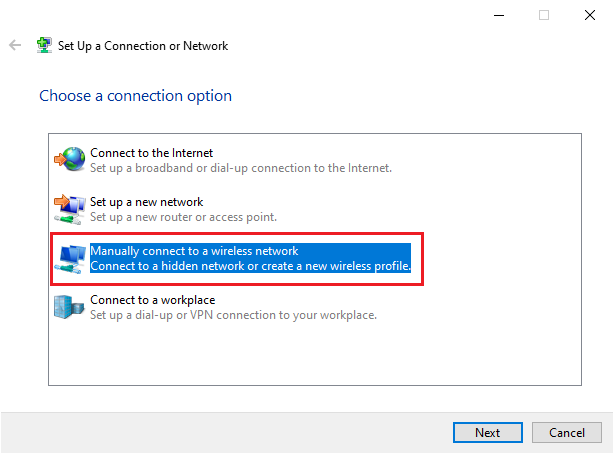
2. Select Set up a new connection or network, then choose Manually connect to a wireless network

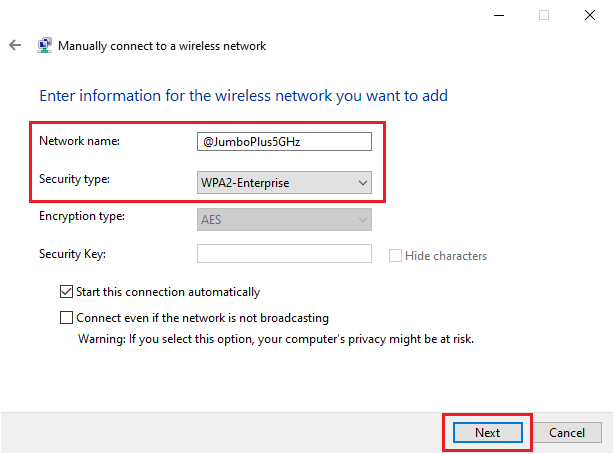
3. In the Network name field, enter @JumboPlus5GHz, and under Security type, select WPA2-Enterprise then click Next.
If your device does not support the 5GHz frequency band, enter '''@JumboPlus''' in the Network name field instead. Please ensure you use the correct uppercase and lowercase letters as shown.

If you're using the network in a university dormitory with an Access Point in your room, make sure to spell the network name correctly according to your room number, e.g., JumboPlus_BuildingName_RoomNumber
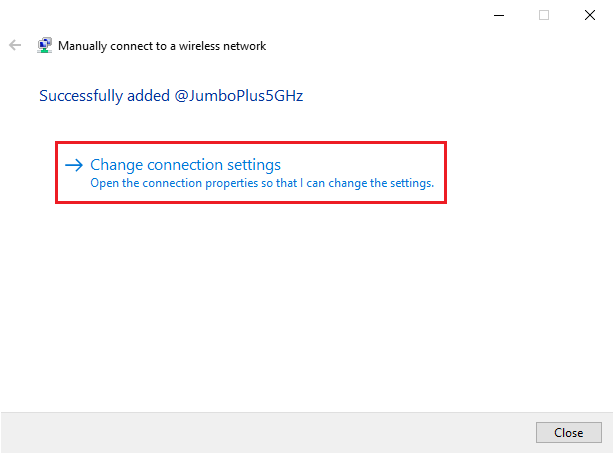
4. Select Change connection settings
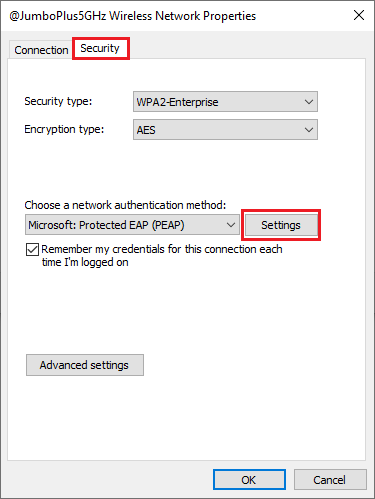
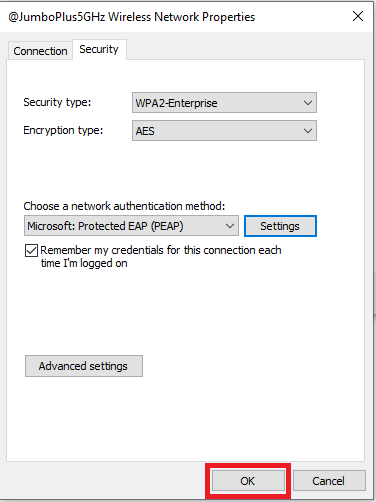
5. Click the Security tab. Under Choose a network authentication method, click Settings.
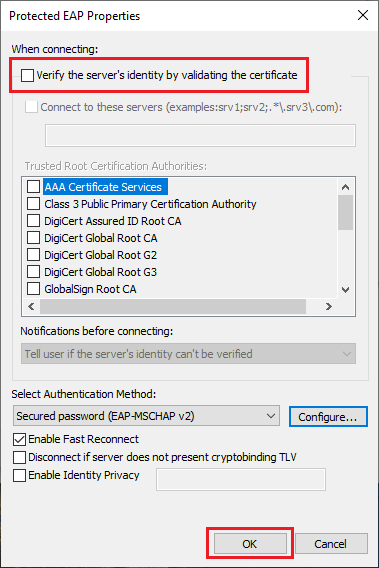
6. In the When connecting section, uncheck the box next to Verify the server's identity by validating the certificate, then click OK.
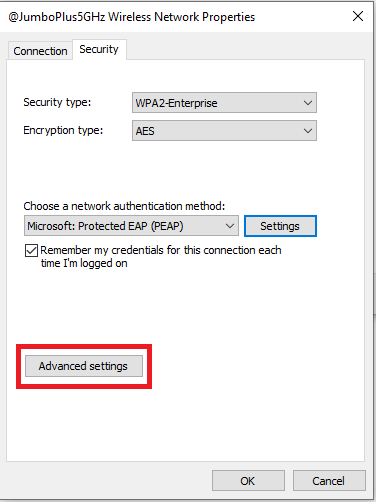
7. Go to "Advanced setting"
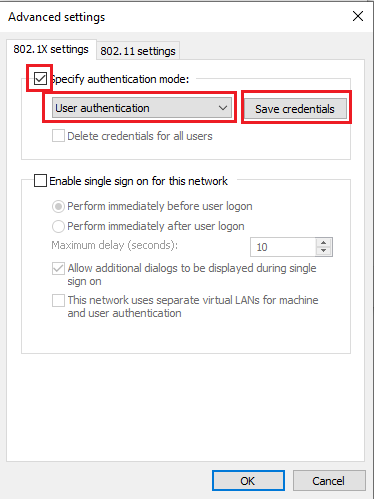
8. Check Specify authentication mode, select User authentication, and click Save credentials
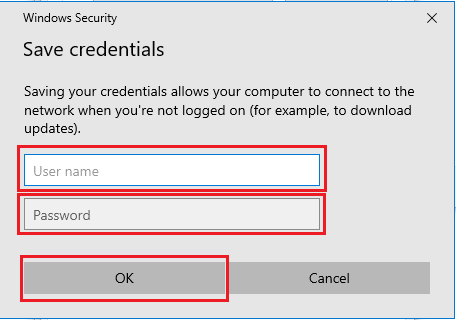
9. On the Windows Security pop-up, enter your CMU Account provided by the university, then click OK.
CMU Student : Firstname_Surname@cmu.ac.th
CMU Staff : Firstname.Surname@cmu.ac.th
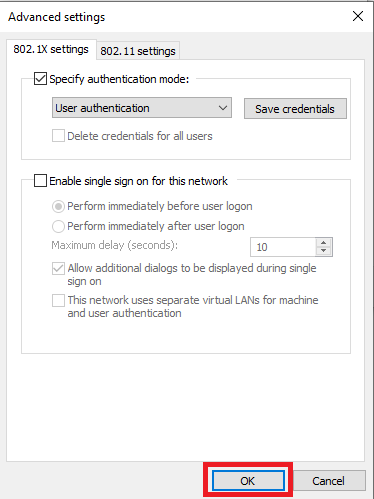
10. Click OK
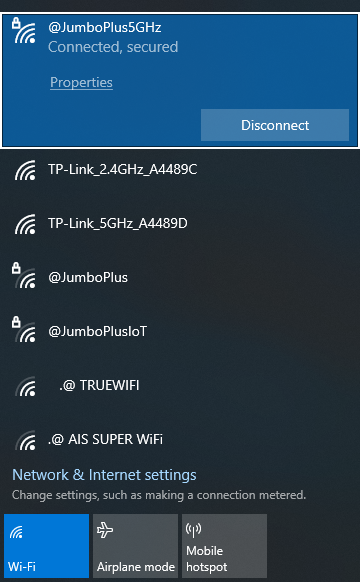
9. Once connected to @JumboPlus5GHz, your device will remember the network. It will automatically connect whenever you're in range.