Difference between revisions of "Windows 10 EN"
Thomhathai (talk | contribs) |
Thomhathai (talk | contribs) |
||
| Line 1: | Line 1: | ||
| − | <h2><b> | + | <h2><b> Connecting to @JumboPlus5GHz on Windows 10 </b></h2> <br/><br/> |
| − | + | Open the Control Panel, go to Network and Internet, and click "View network status and tasks." | |
| − | + | <br/> [[File:่001win10.png |800px| link=]]<br/> | |
| − | + | ||
| − | + | Select "Set up a new connection or network" and then choose "Manually connect to a wireless network." | |
| − | + | <br/> [[File:002win10.PNG |800px|link=]]<br/> <br/> [[File:003win10.PNG | link=]]<br/> | |
| − | + | ||
| + | In the Network name field, enter "@JumboPlus5GHz", and in the Security type field, select "WPA2-Enterprise", then click "Next." | ||
| + | <br/> [[File:004win10.PNG | link=]]<br/> | ||
| + | |||
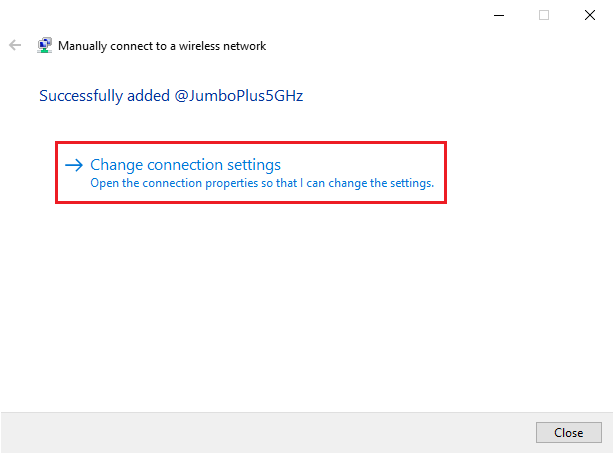
| + | Select "Change connection settings." | ||
| + | <br/> [[File:005win10.PNG | link=]]<br/> | ||
| + | |||
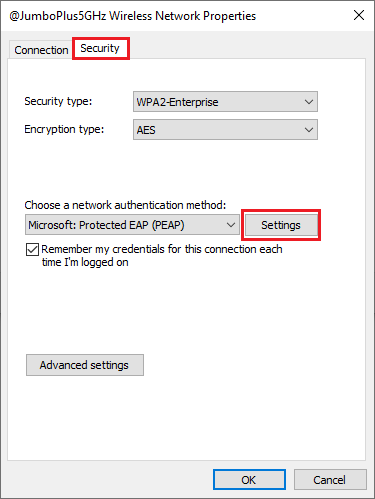
| + | Click on the Security tab. Under "Choose a network authentication method," click "Settings." | ||
| + | <br/> [[File:006win10.PNG | link=]]<br/> | ||
| + | |||
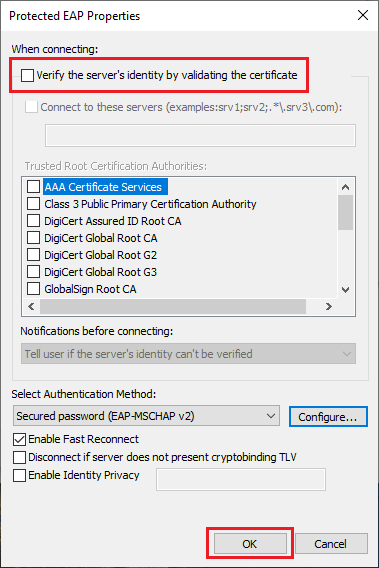
| + | Under "When connecting," uncheck the box next to "Verify the server's identity by validating the certificate," then click "OK." | ||
| + | <br/> [[File:007win10.PNG | link=]]<br/> | ||
| + | |||
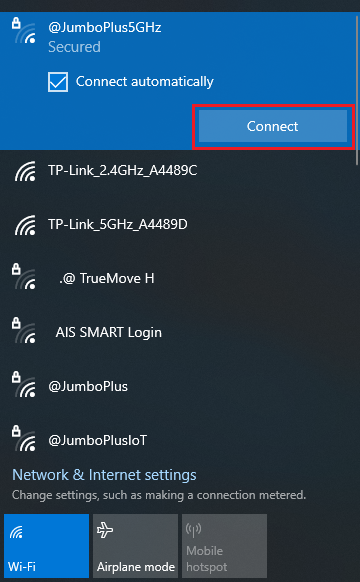
| + | Next, in the Wi-Fi connection window, click Connect on the @JumboPlus5GHz network. | ||
| + | <br/> [[File:009win10.png | link=]]<br/> | ||
| + | |||
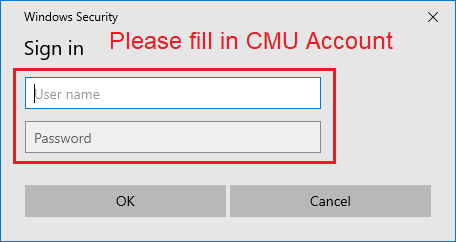
| + | Enter your CMU Account and click OK. | ||
| + | <br/> [[File:010win10.png| link=]]<br/> | ||
| + | |||
| + | Once successfully connected to @JumboPlus5GHz, your device will remember the connection. The next time you are within range, it will connect automatically. | ||
| + | <br/> [[File:011win10.png| link=]]<br/> | ||
Revision as of 09:50, 5 August 2025
Connecting to @JumboPlus5GHz on Windows 10
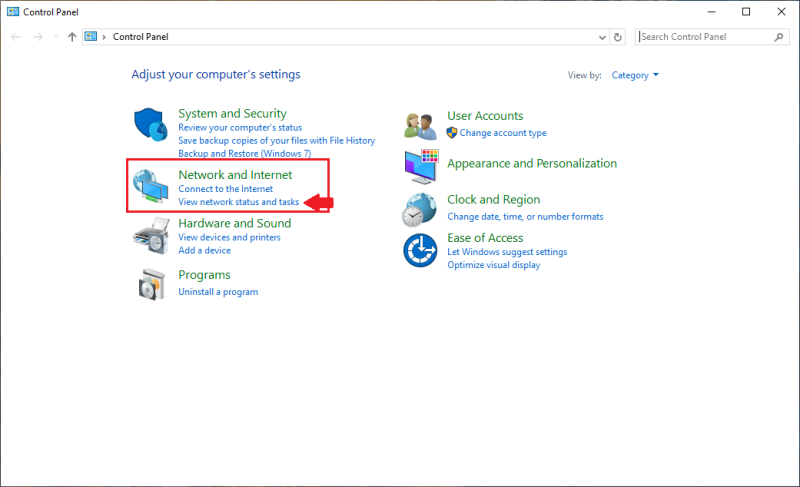
Open the Control Panel, go to Network and Internet, and click "View network status and tasks."
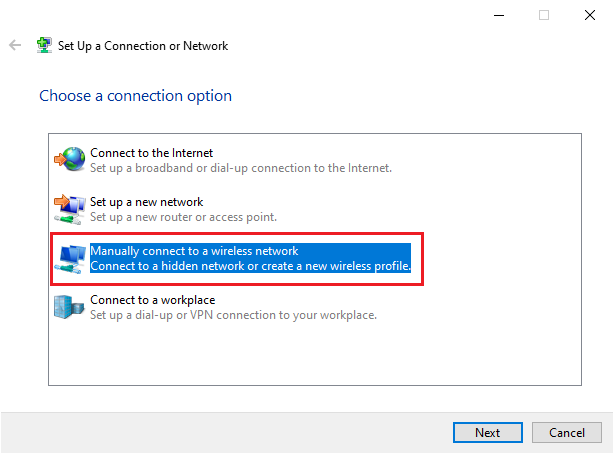
Select "Set up a new connection or network" and then choose "Manually connect to a wireless network."

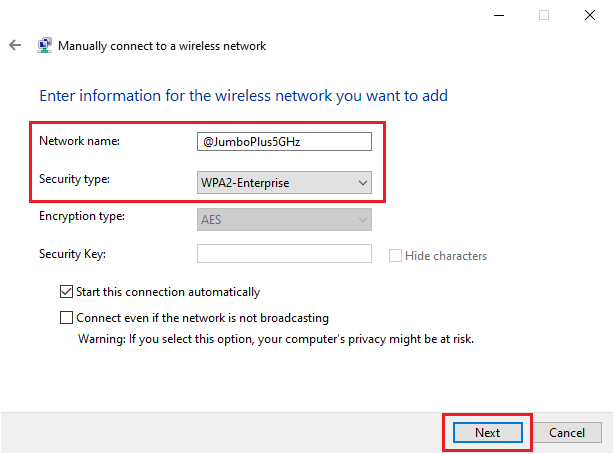
In the Network name field, enter "@JumboPlus5GHz", and in the Security type field, select "WPA2-Enterprise", then click "Next."
Select "Change connection settings."
Click on the Security tab. Under "Choose a network authentication method," click "Settings."
Under "When connecting," uncheck the box next to "Verify the server's identity by validating the certificate," then click "OK."
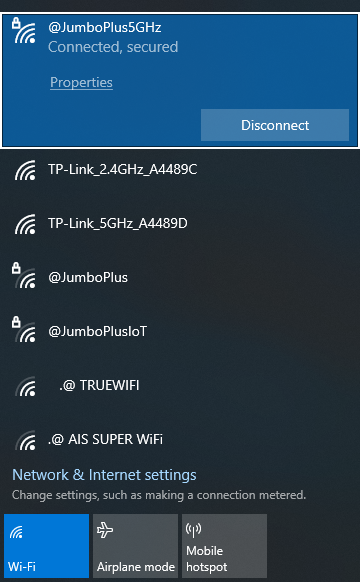
Next, in the Wi-Fi connection window, click Connect on the @JumboPlus5GHz network.
Enter your CMU Account and click OK.
Once successfully connected to @JumboPlus5GHz, your device will remember the connection. The next time you are within range, it will connect automatically.