Difference between revisions of "Windows 11 EN"
Thomhathai (talk | contribs) (Created page with "<h2><b> How to connect @JumboPlus or @JumboPlus5GHz for Windows 10 </b></h2> <br/><br/> 1. Press the Wi-Fi icon on the Taskbar (bottom right-hand corner) File: JumboWin10 04...") |
(No difference)
|
Revision as of 09:48, 5 August 2025
How to connect @JumboPlus or @JumboPlus5GHz for Windows 10
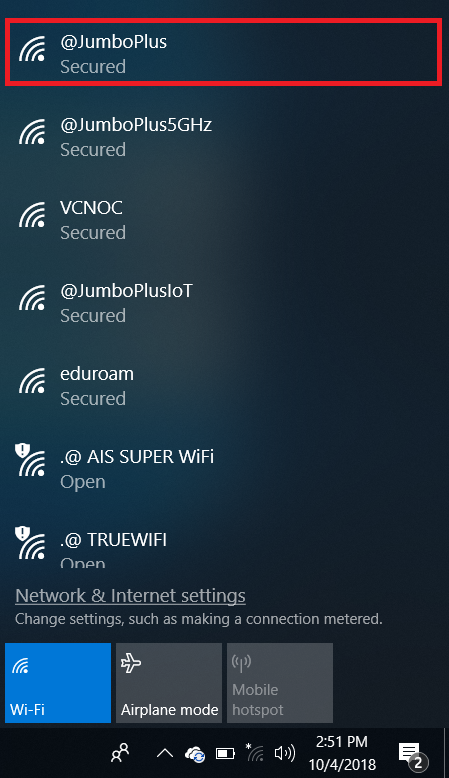
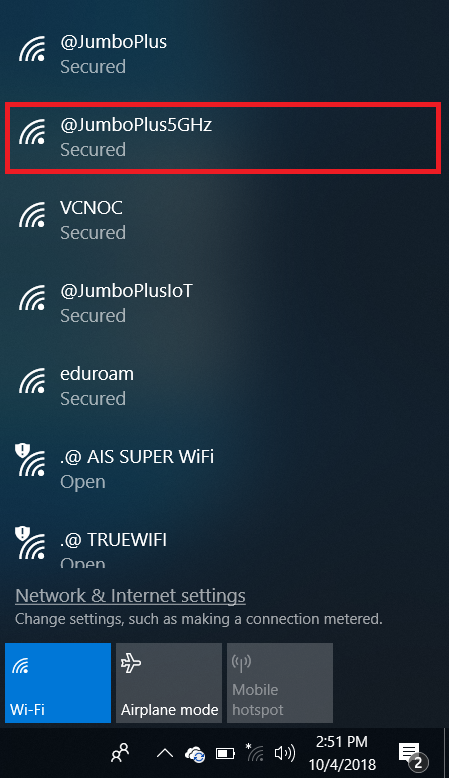
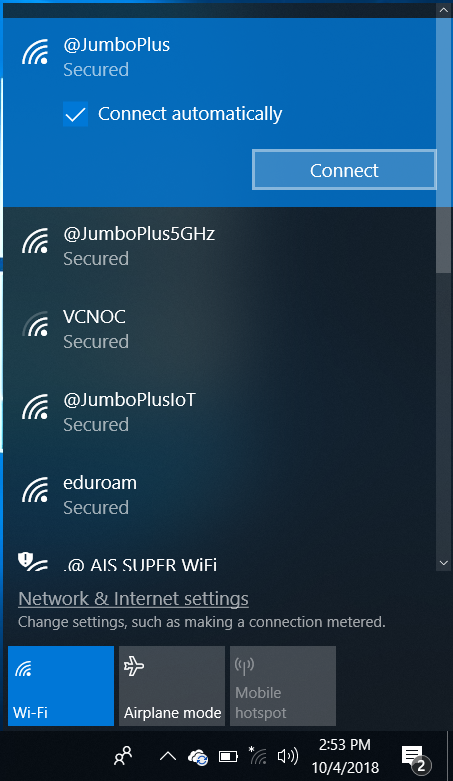
1. Press the Wi-Fi icon on the Taskbar (bottom right-hand corner)  to check if your device sees the Wi-Fi names: @JumboPlus or @JumboPlus5GHz.
** If you only see the name @JumboPlus, it means your device supports the 2.4 GHz frequency only. **
*** If you see both names, it means your device supports the 5GHz frequency. It is recommended to connect to @JumboPlus5GHz. ***
Please select only one name. If you choose both names on the same device, it may result in intermittent connectivity issues.
2. At the Windows Security window, enter your CMU Account, which you received from the university, and then click OK
CMU Student: Firstname_Surname@cmu.ac.th
CMU Staff : Firstname.Surname@cmu.ac.th 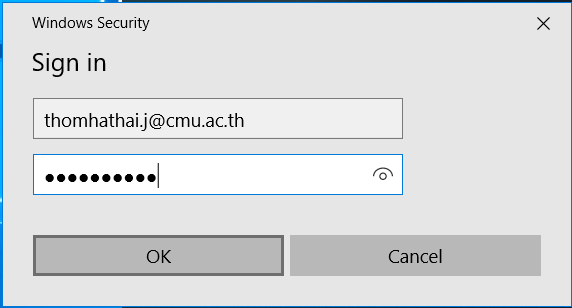
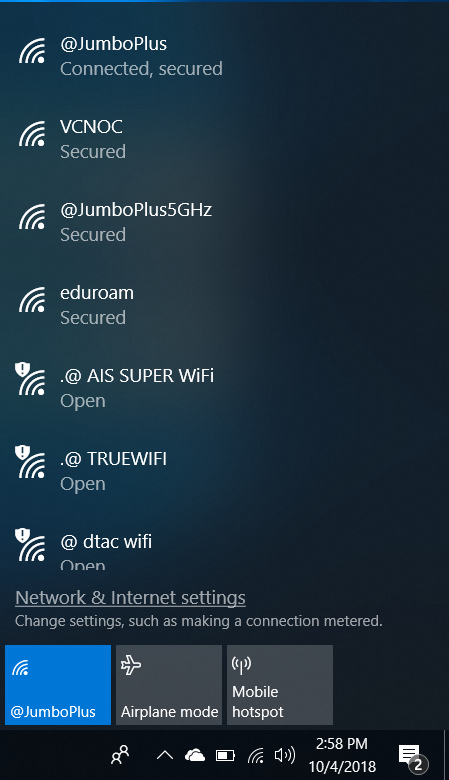
3. Click the connectivity icon on the Taskbar
4. Select either @JumboPlus or @JumboPlus5GHz, and then click Connect
5. After successfully connecting to @JumboPlus or @JumboPlus5GHz, the device will remember the connection for the next time when in a signal area. The device will automatically connect