Difference between revisions of "Network monitoring"
From CMU ITSC Network
| Line 98: | Line 98: | ||
== เพิ่มอุปกรณ์ประเภท switch == | == เพิ่มอุปกรณ์ประเภท switch == | ||
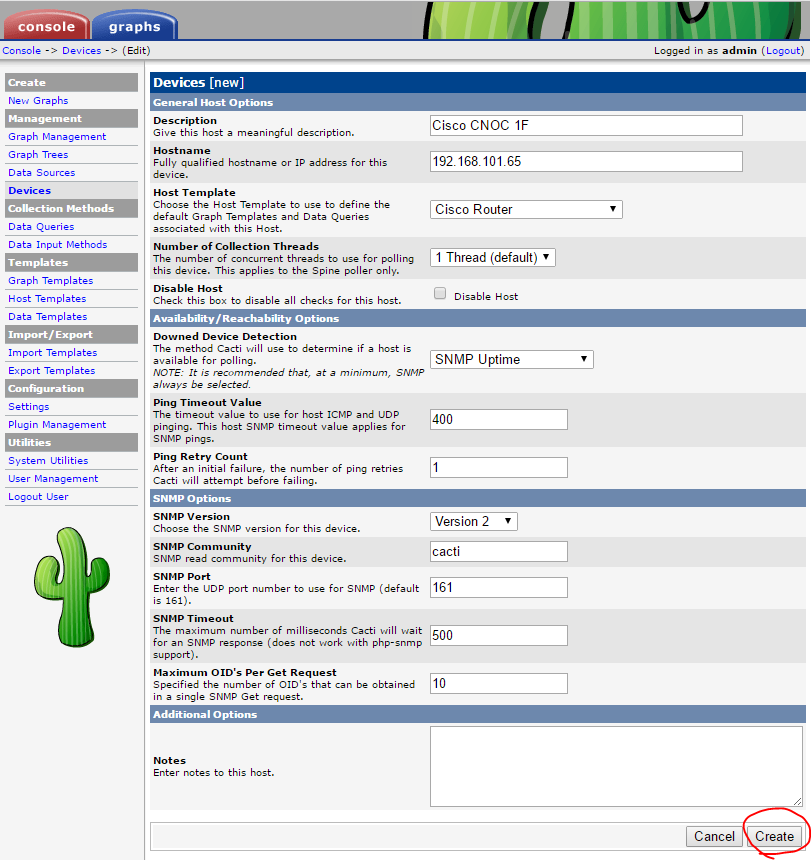
| − | # [[File:CactiAddSwitch01.PNG|link=]] | + | * เพิ่มอุปกรณ์ |
| − | # [[File:CactiAddSwitch02.PNG|link=]] | + | *# คลิก Add<br>[[File:CactiAddSwitch01.PNG|link=]] |
| + | *# ระบุข้อมูล SNMP ของอุปกรณ์ปลายทาง<br>[[File:CactiAddSwitch02.PNG|link=]] | ||
| + | |||
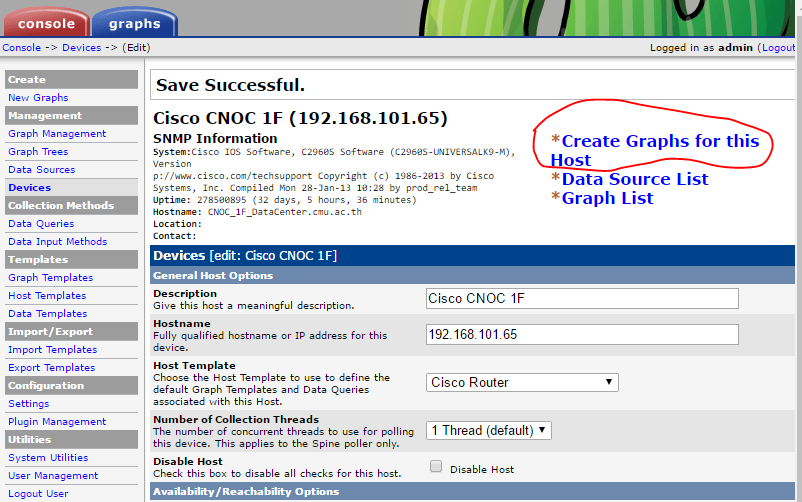
| + | * สร้างกราฟ | ||
| + | *# คลิก Create Graphs for this host<br>[[File:CactiAddSwitch03.PNG|link=]] | ||
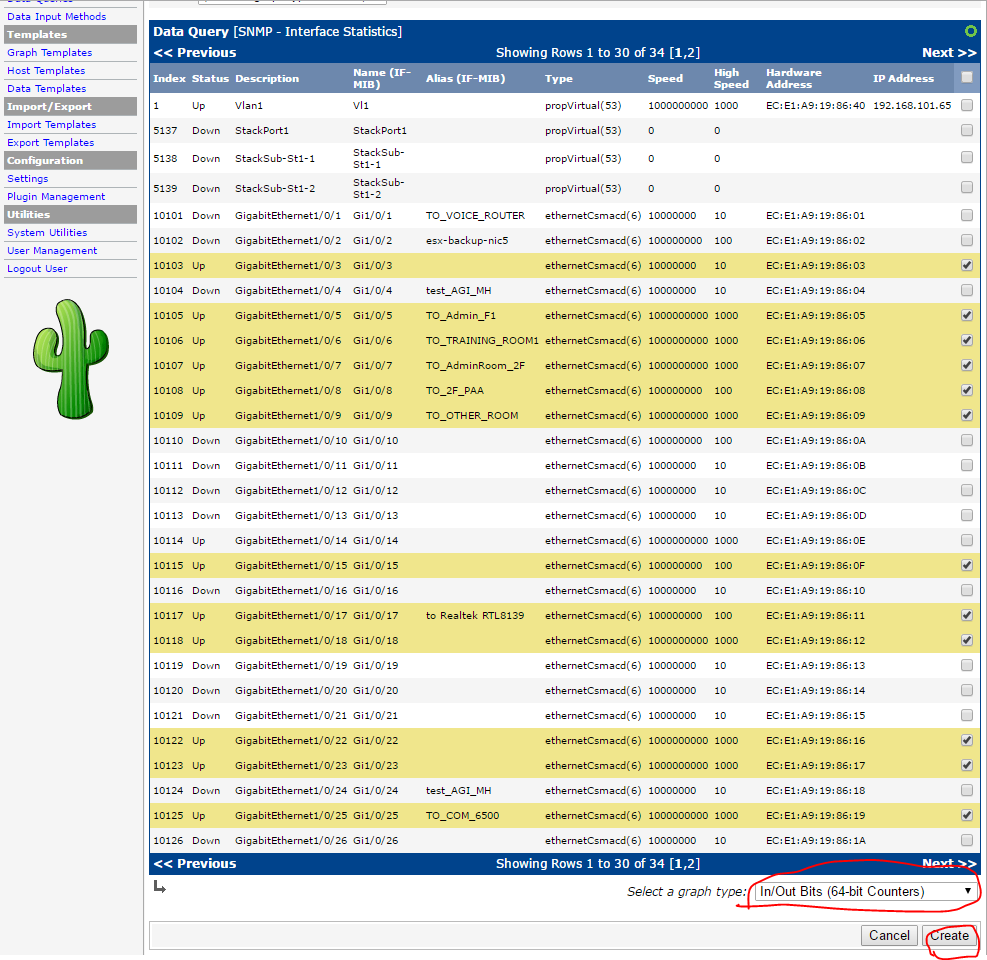
| + | *# เลือก 64bits counter สำหรับ Gigabits Interface<br>[[File:CactiAddSwitch04.PNG|link=]] | ||
Revision as of 17:09, 6 June 2016
SNMP
- เป็น protocol มาตรฐานบนอุปกรณ์เครือข่ายที่ใช้บริหารจัดการอุปกรณ์เช่นการอ่านค่าต่าง ๆ จากอุปกรณ์หรือส่งคำสั่งเพื่อเปลี่ยนแปลงค่าต่าง ๆ ของอุปกรณ์
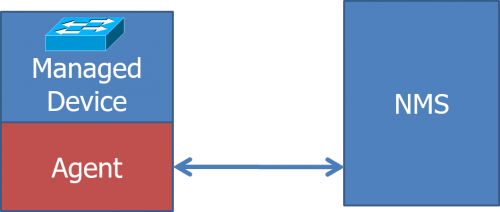
- โดยมี Network Management System(NMS) ติดตั้งซอฟท์แวร์สำหรับการจัดการ โดยติดต่อไปที่ SNMP agent ที่อยู่บนอุปกรณ์ที่เป็น Managed Device เช่น Router, Switch, Server host เป็นต้น
- SNMP Agent จะเปิดให้บริการที่ UDP Port 161
- การเข้าถึงข้อมูลต่าง ๆ บน SNMP Agent จะอ้างอิงผ่าน Object identifier(OID) หรือ Management Information Base(MIB) ซึ่งข้อมูลค่าต่าง ๆ จะถูกเก็บไว้เป็นโครงสร้าง tree และมี index เชื่อมกันในแต่ละกิ่งของข้อมูล
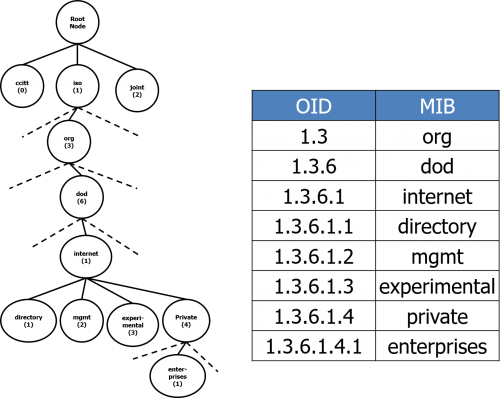
snmpd
- snmpd เป็น service ที่เป็น snmp agent บน Linux host (ในที่นี้ใช้ Ubuntu 14.04.4) ติดตั้งโดยใช้คำสั่ง
apt-get install snmp snmpd snmp-mibs-downloader
- แก้ไขไฟล์ /etc/snmp/snmpd.conf เพื่อกำหนดค่า community string และเปิดให้ remote NMS สามารถดึงข้อมูลได้
#agentAddress udp:127.0.0.1:161
agentAddress udp:161

rocommunity [community string]  default
- restart snmpd
service snmpd restart
การดึงข้อมูลจาก SNMP
- snmpget
ดึงข้อมูลจาก snmp agent ผ่าน OID หรือ MIB
รูปแบบคำสั่งเป็น snmpget [OPTIONS] AGENT OID [OID] …
โดยมี options ที่สำคัญคือ
-v : เวอร์ชั่นของ snmp {1, 2c, 3}
-c : community string
-On : แสดง OID เป็นตัวเลขแทน MIB
snmpget -v 2c -c [community string] [agent ip] sysName.0
SNMPv2-MIB::sysName.0 = STRING: ubuntu

snmpget -v 2c -c [community string] -On [agent ip] sysName.0
.1.3.6.1.2.1.1.5.0 = STRING: ubuntu
- snmpgetnext
ดึงข้อมูลแรกถัดจาก OID ที่ระบุ
snmpgetnext -v 2c -c [community string] [agent ip] .
SNMPv2-MIB::sysDescr.0 = STRING: Linux ubuntu 3.13.0-46-generic #79-Ubuntu SMP Tue Mar 10 20:06:50 UTC 2015 x86_64

snmpget -v 2c -c [community string] -On [agent ip] .
.1.3.6.1.2.1.1.1.0 = STRING: Linux ubuntu 3.13.0-46-generic #79-Ubuntu SMP Tue Mar 10 20:06:50 UTC 2015 x86_64
- snmpwalk
ดึงข้อมูลทั้งหมดถัดจาก OID ที่ระบุ
snmpwalk -v 2c -c qwerty localhost interface
IF-MIB::ifNumber.0 = INTEGER: 2
IF-MIB::ifIndex.1 = INTEGER: 1
IF-MIB::ifIndex.2 = INTEGER: 2
IF-MIB::ifDescr.1 = STRING: lo
IF-MIB::ifDescr.2 = STRING: eth0
IF-MIB::ifType.1 = INTEGER: softwareLoopback(24)
IF-MIB::ifType.2 = INTEGER: ethernetCsmacd(6)
IF-MIB::ifMtu.1 = INTEGER: 65536
IF-MIB::ifMtu.2 = INTEGER: 1500
IF-MIB::ifSpeed.1 = Gauge32: 10000000
IF-MIB::ifSpeed.2 = Gauge32: 1000000000
IF-MIB::ifPhysAddress.1 = STRING:
IF-MIB::ifPhysAddress.2 = STRING: 8:0:27:34:e1:8f
IF-MIB::ifAdminStatus.1 = INTEGER: up(1)
IF-MIB::ifAdminStatus.2 = INTEGER: up(1)
IF-MIB::ifOperStatus.1 = INTEGER: up(1)
IF-MIB::ifOperStatus.2 = INTEGER: up(1)
IF-MIB::ifLastChange.1 = Timeticks: (0) 0:00:00.00
- GUI snmp client
http://www.ireasoning.com Free MIB Browser
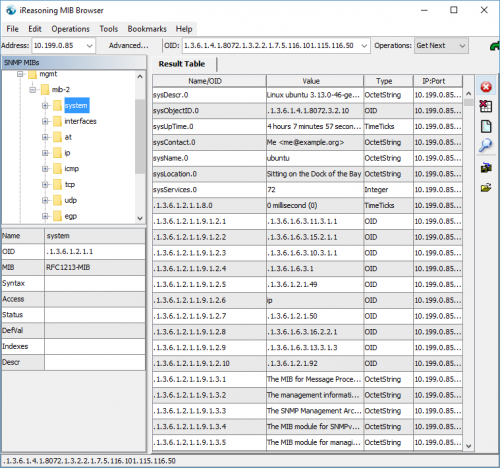
cacti
เป็นระบบ monitoring ที่ใช้ rrdtool เก็บข้อมูลและทำกราฟทำให้ทำงานได้เร็ว มี template หลากหลาย ดึงข้อมูลแบบปรับแต่งเองได้หลากหลาย มี plugins ให้ใช้งานและจัดการผู้ใช้ได้ http://cacti.net
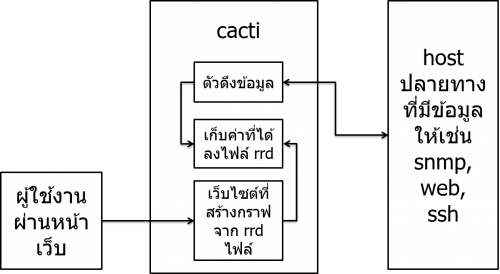
ติดตั้ง cacti
apt-get install cacti

ให้ตั้งรหัสผ่านของ mysql root user
เลือก apache2 เป็น http server
ระบุรหัสผ่านของ mysql root
ตั้งค่ารหัสผ่านของ mysql cacti user
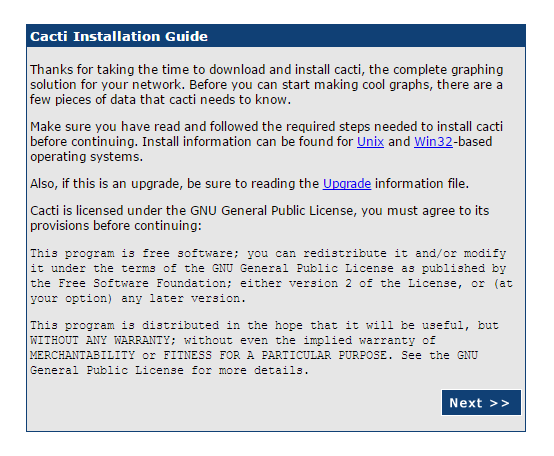
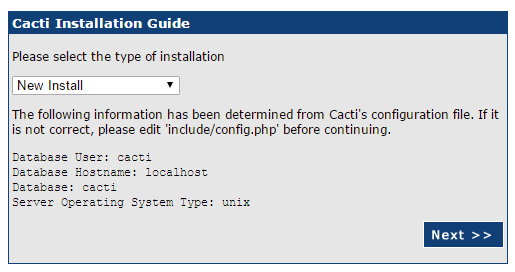
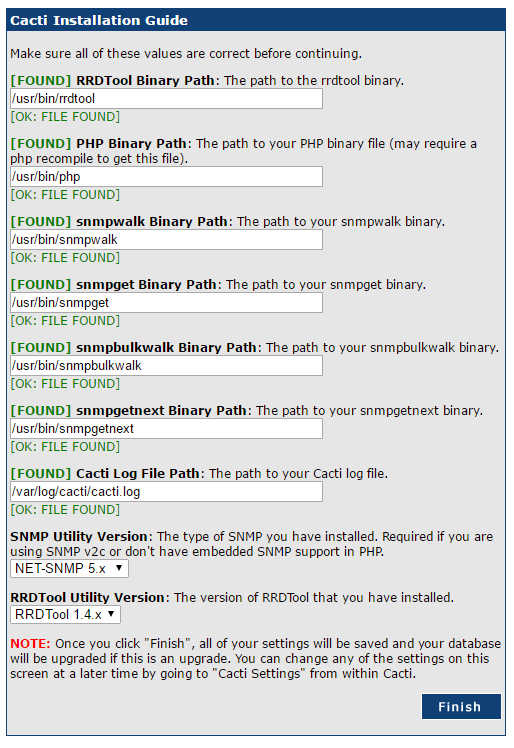
จากนั้นเรียก cacti ผ่าน browser http://[ip or hostname]/cacti และทำตามขั้นตอน ใช้ username และ password เริ่มต้นเป็น admin และตั้งค่ารหัสผ่านใหม่
เพิ่มอุปกรณ์ประเภท switch
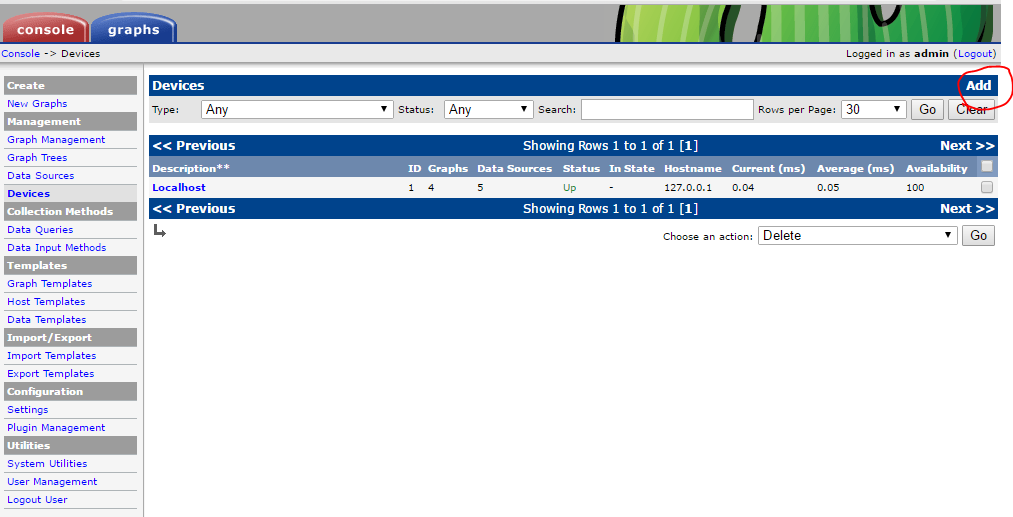
- เพิ่มอุปกรณ์
- คลิก Add
- ระบุข้อมูล SNMP ของอุปกรณ์ปลายทาง
- คลิก Add
- สร้างกราฟ
- คลิก Create Graphs for this host
- เลือก 64bits counter สำหรับ Gigabits Interface
- คลิก Create Graphs for this host
