Difference between revisions of "Windows 7"
From CMU ITSC Network
Thomhathai (talk | contribs) |
Thomhathai (talk | contribs) |
||
| Line 12: | Line 12: | ||
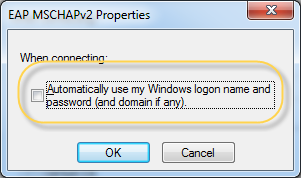
# หลังจากนั้น นำเครื่องหมายถูกออกจาก Automatically use my Windows logon name and paaword (and domain if any) และกดปุ่ม OK ตามลำดับ <br/><br/>[[File:Jumbo Win7 10.png|link=]] <br/><br/> | # หลังจากนั้น นำเครื่องหมายถูกออกจาก Automatically use my Windows logon name and paaword (and domain if any) และกดปุ่ม OK ตามลำดับ <br/><br/>[[File:Jumbo Win7 10.png|link=]] <br/><br/> | ||
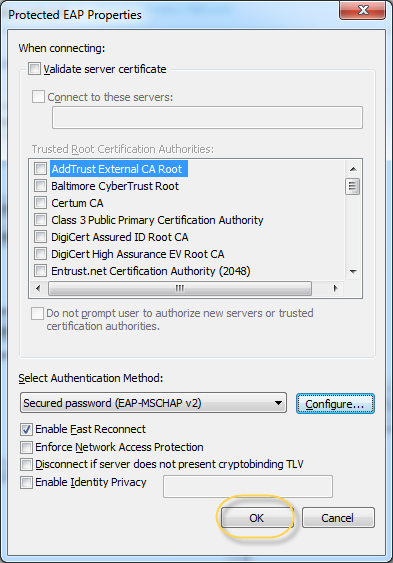
# บนหน้าต่าง Protected EAP Properties กด "OK" <br/><br/>[[File:Jumbo Win7 10 01.png|link=]] <br/><br/> | # บนหน้าต่าง Protected EAP Properties กด "OK" <br/><br/>[[File:Jumbo Win7 10 01.png|link=]] <br/><br/> | ||
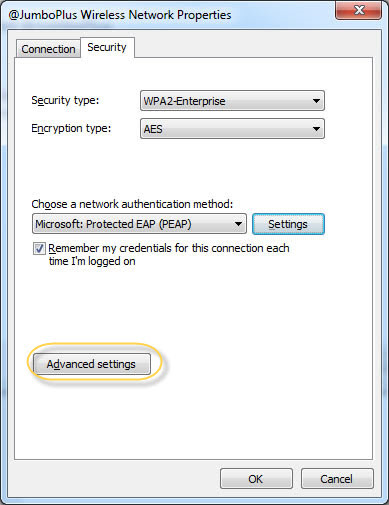
| + | # บนหน้าต่าง Wireless Network Properties กด "Advanced settings" <br/><br/>[[File:Jumbo Win7 10 02.png|link=]] <br/><br/> | ||
Revision as of 04:38, 24 September 2018
== การเชื่อมต่อ @JumboPlus และ @JumboPlus 5 GHz สำหรับ Windows 7 ==
- กดสัญญลักษณ์ Wi-Fi ที่ Taskbar
 เพื่อเช็คว่าอุปกรณ์เห็นชื่อ Wi-Fi @JumboPlus หรือ @JumboPlus5GHz
 - ไปที่ "Start menu" -> "Control Panel" -> "Network and Internet"
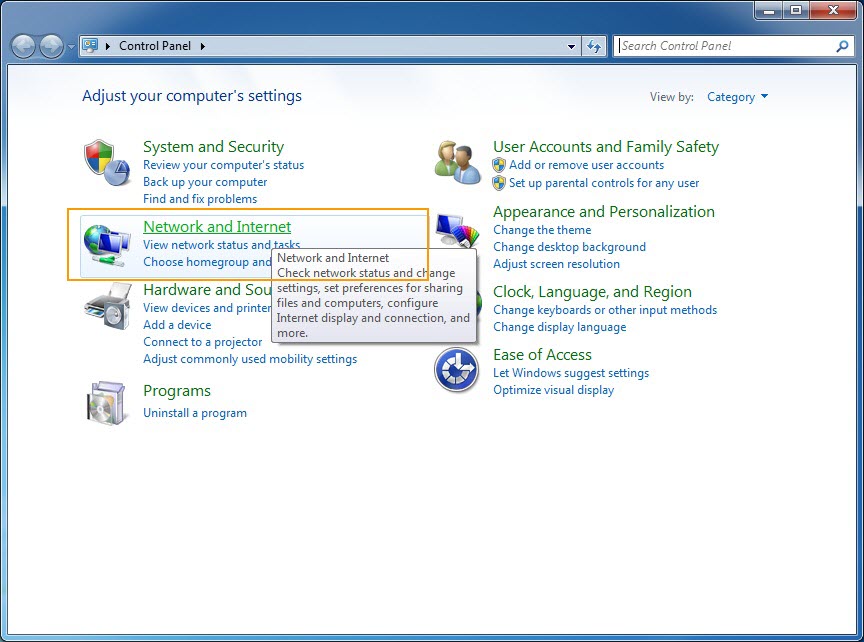
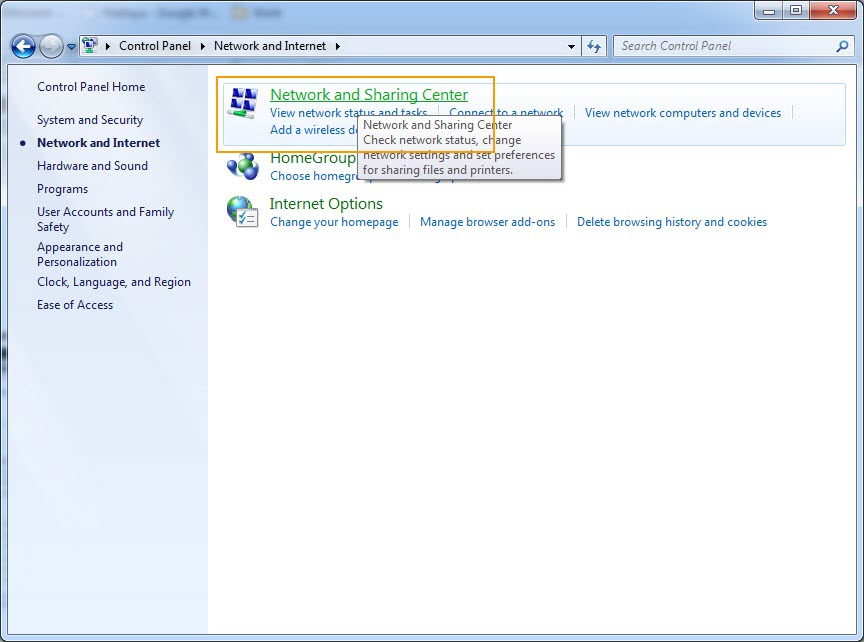
- กด "Network and Sharing Center"
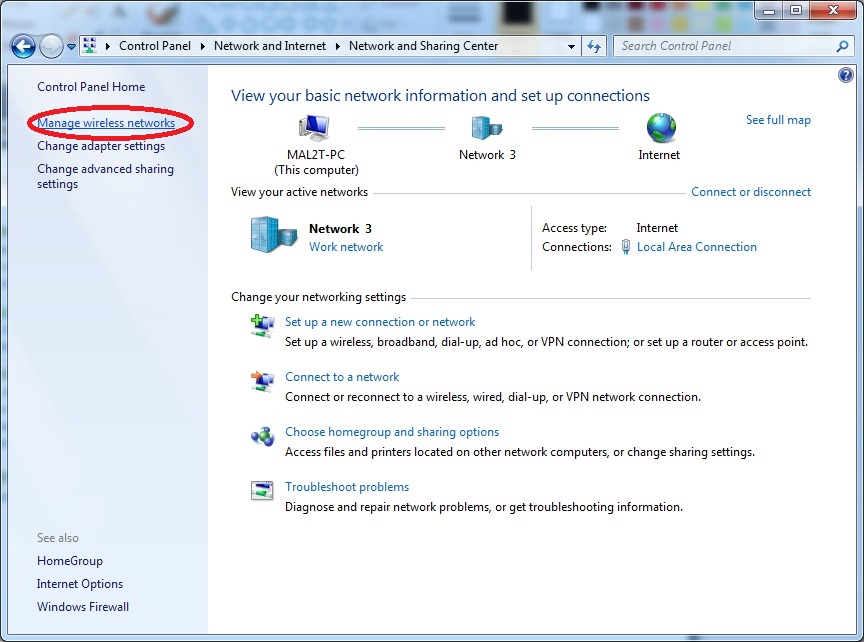
- ทางด้านซ้ายกด "Manage Wireless Networks"
- บนหน้าต่าง Manage Wireless Networks กด "Add"
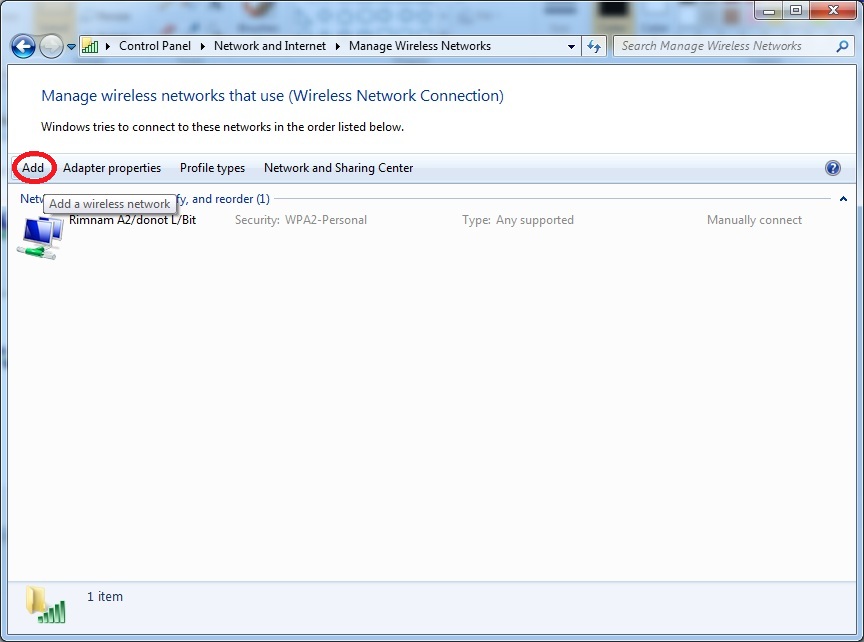
- กด "Manually create a network profile"
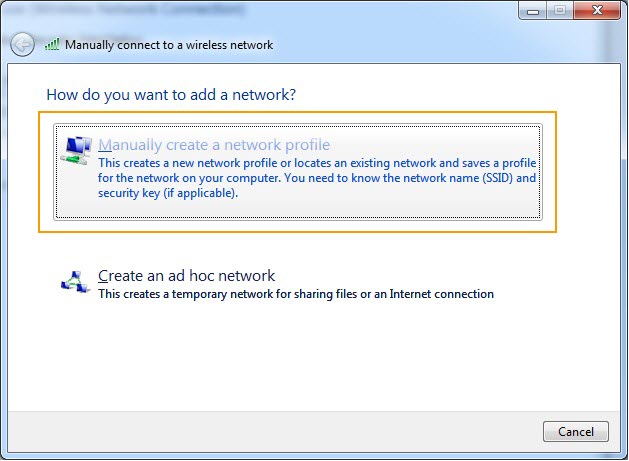
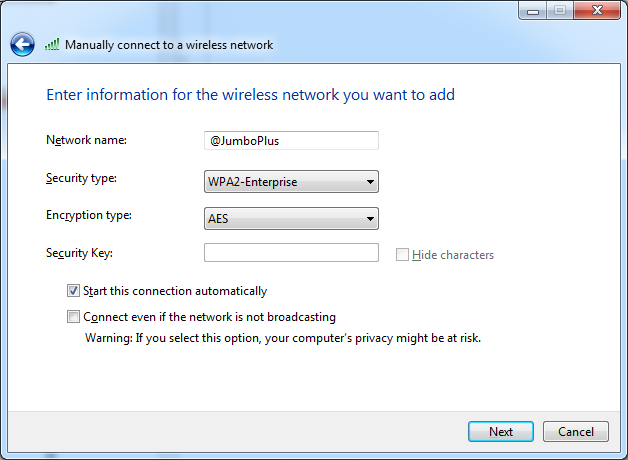
- บนหน้าต่าง Manually connect to a wireless network ตั้งค่าดังนี้
Network name : @JumboPlus หรือ @JumboPlus5GHz (โปรดอ่านหมายเหตุ)
Security type : WPA2-Enterprise
Encryption type : AES
จากนั้นกด "Next"
หมายเหตุ
จากข้อ 1 กรณีเห็น @JumboPlus ชื่อเดียว แสดงว่าอุปกรณ์ของท่านรองรับคลื่นความถี่ 2.4GHz เท่านั้น ต้องใส่ Network name เป็น @JumboPlus
กรณีเห็นทั้งสองชื่อ แสดงว่าอุปกรณ์ของท่านรองรับคลื่นความถี่ 5GHz ให้ใส่ Network name เป็น @JumboPlus5GHz
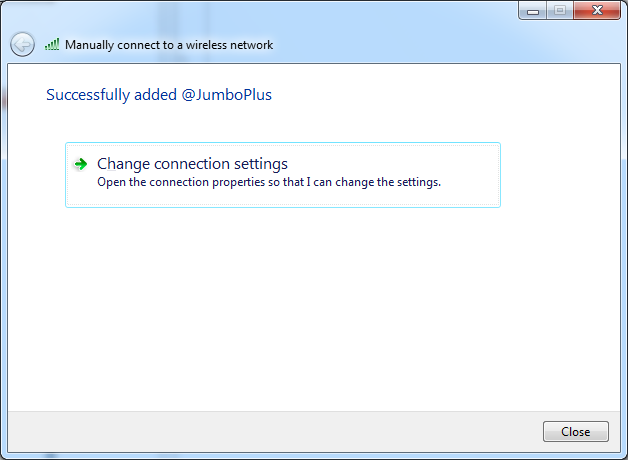
- บนหน้าต่าง Manually connect to a wireless network จะพบข้อความ Successfully added network กด "Change connection settings"
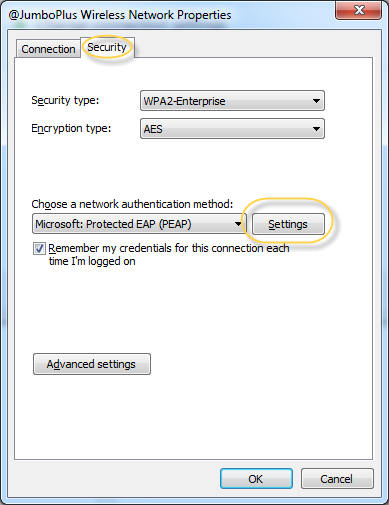
- บนหน้าต่าง Wireless Network Properties เลือกแท็บ "Security" จากนั้นกด "Settings"
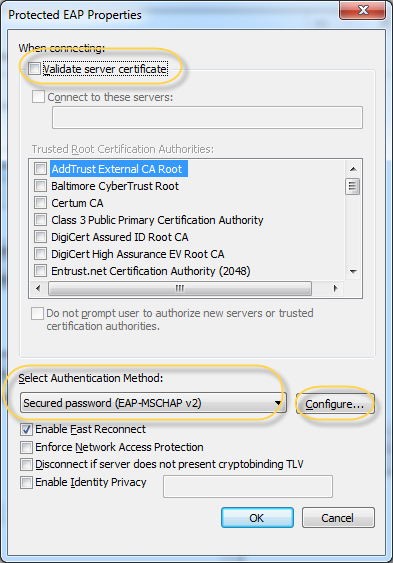
- ที่หน้าต่าง Protected EAP Properties ให้นำเครื่องหมายถูกออกจาก Verify the server's identity by validation the certificate แล้วกดที่ปุ่ม Configure..
- หลังจากนั้น นำเครื่องหมายถูกออกจาก Automatically use my Windows logon name and paaword (and domain if any) และกดปุ่ม OK ตามลำดับ
- บนหน้าต่าง Protected EAP Properties กด "OK"
- บนหน้าต่าง Wireless Network Properties กด "Advanced settings"
